Stuff My Kid Eats: Pork Medallions with Chickpeas and Cabbage

Warning: Vegetarians turn back now; this post is about pigs. Lots and lots of delicious pigs! 

IMG_0758

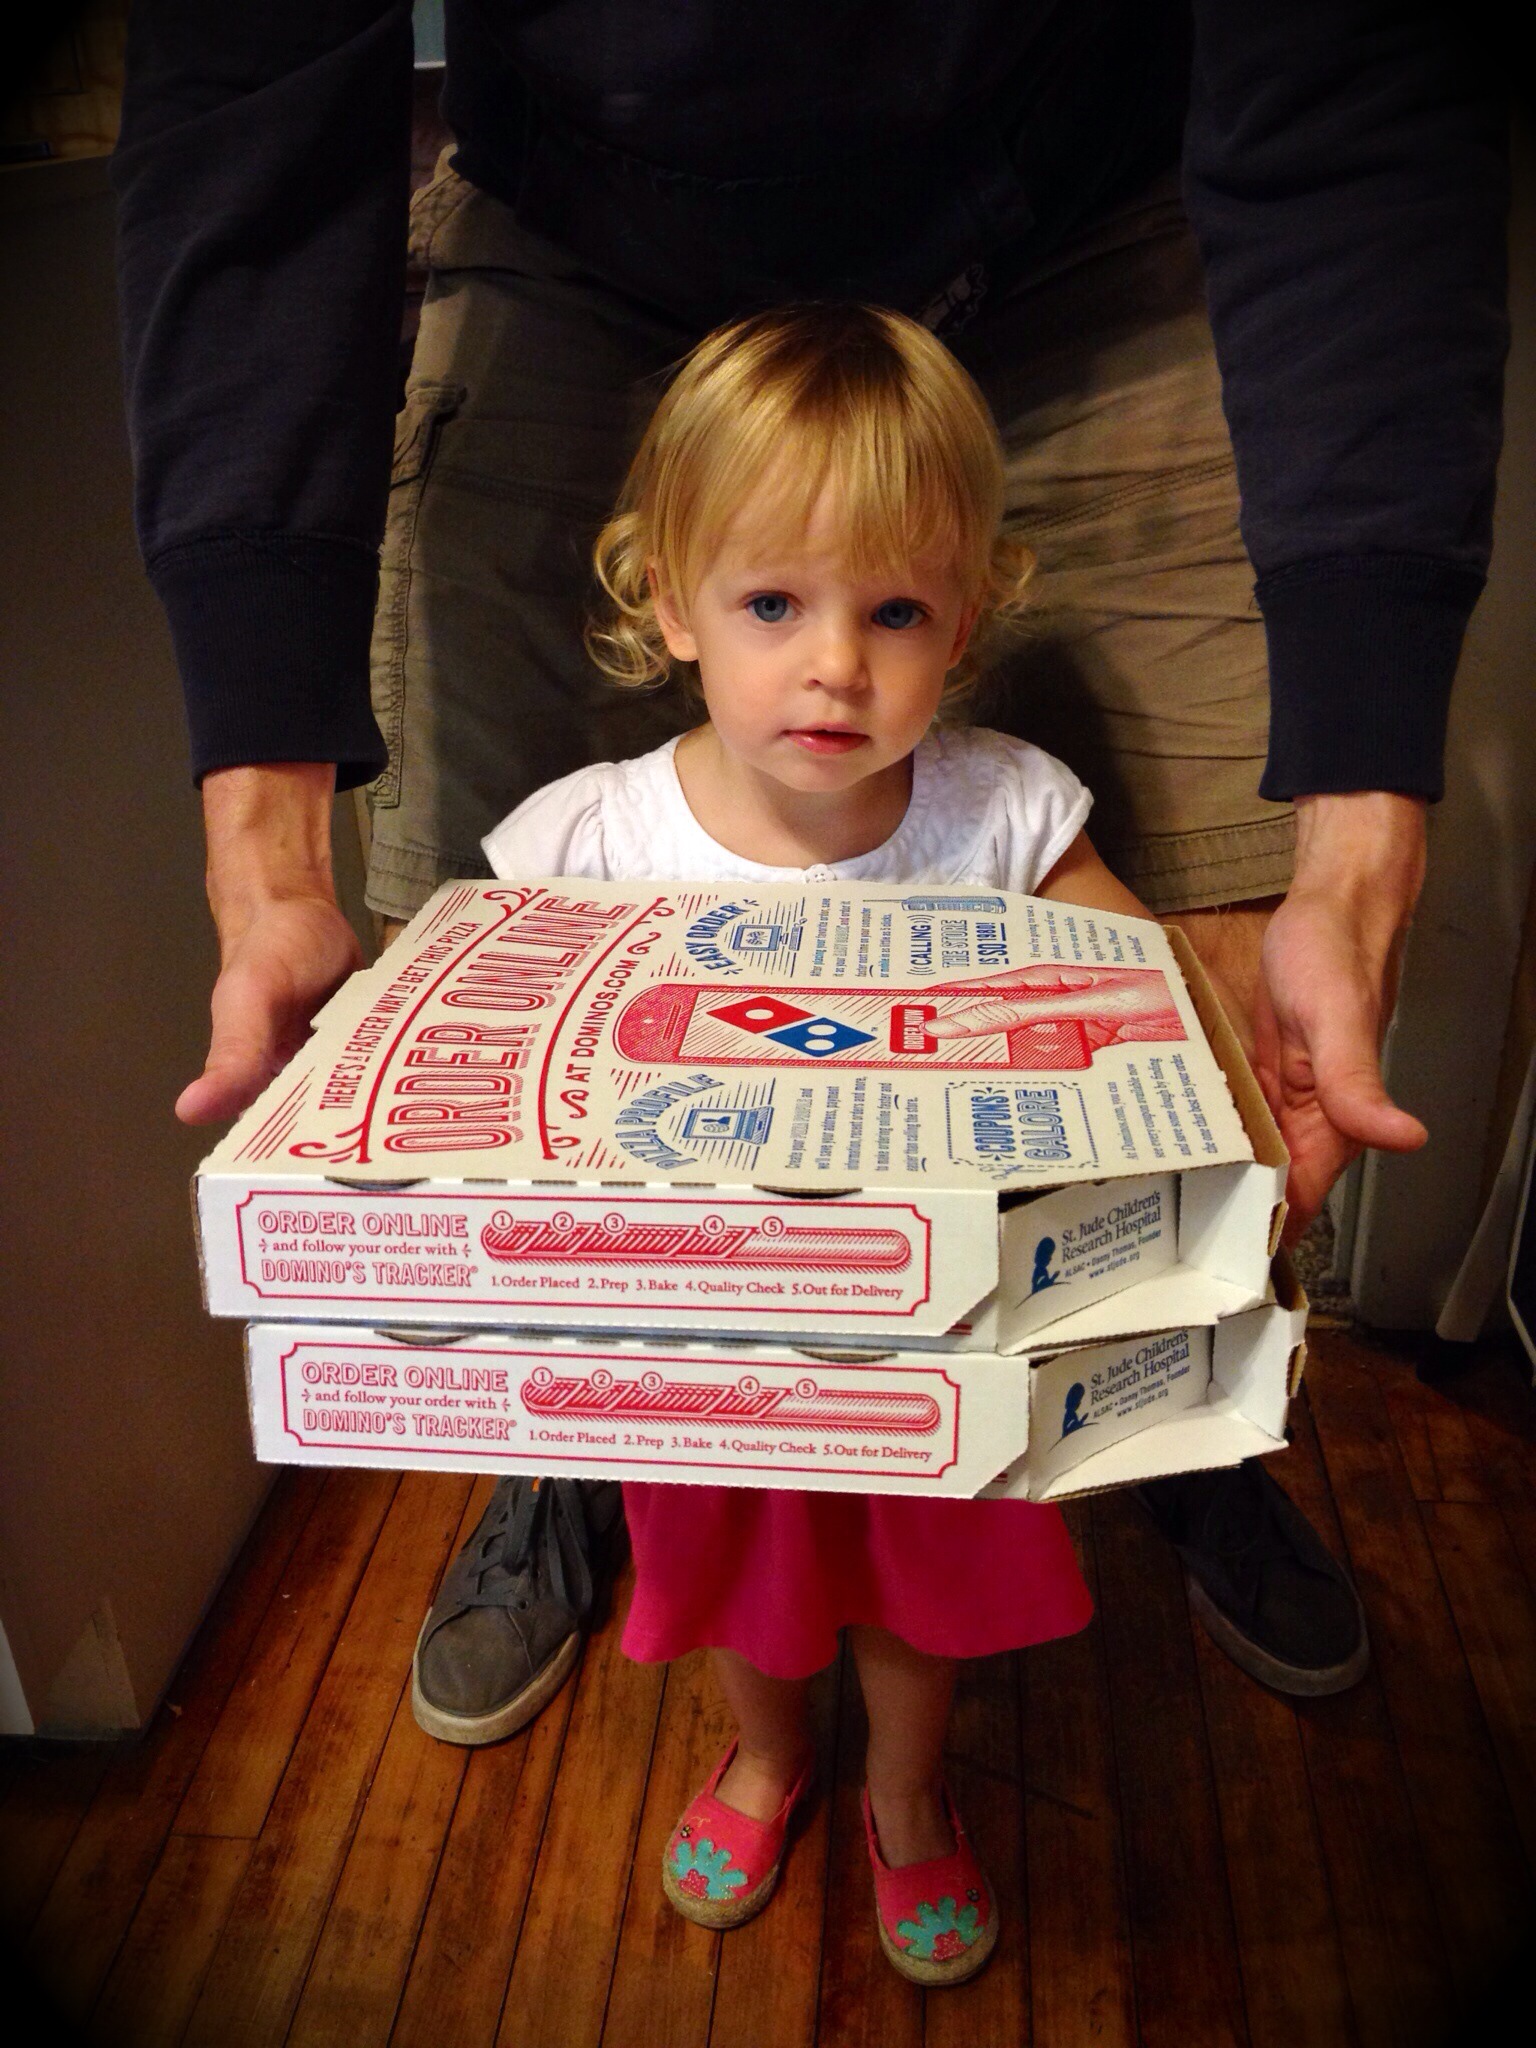
{ My toddler at the Pork & Pickle }

My toddler loves pigs. Absolutely loves them! I’m not talking about the cute, little pink guys that appear in most of her story books (although she loves those, too), I’m talking about the kind you eat. Bacon, ham, pork, you name it, the child will gobble it up, no questions asked. During our most recent travels, we ended up with a couple hours to kill in the Kansas City International Airport, and found a real gem of an eatery, Pork & Pickle, which serves, you guessed it…pork and pickles (among other things). It’s located on the second floor of the Southwest terminal, and once you emerge from the wood paneled elevator, you almost forget that you’re eating in an airport. Almost. The menu had a nice variety of pork that spanned from BBQ to brats…and it got me thinking: I need to cook more pork! It’s a healthy alternative to red meat, it’s more fun than chicken, and it gets my toddler to come to the dinner table without complaint. And then, almost as if it were meant to be, the Fine Cooking magazine I brought with me to read on the plane had a great looking pork recipe. I love it when things work out like that, don’t you? Anyway, I tried it out as soon as we got home, and it turned out to be one of the best pork dishes I’ve had in a long time. And my toddler loved it, which makes it a win-win for me!

IMG_0759

Pork & Pickle in the Kansas City International Airport }

Pork Medallions with Chickpeas and Cabbage

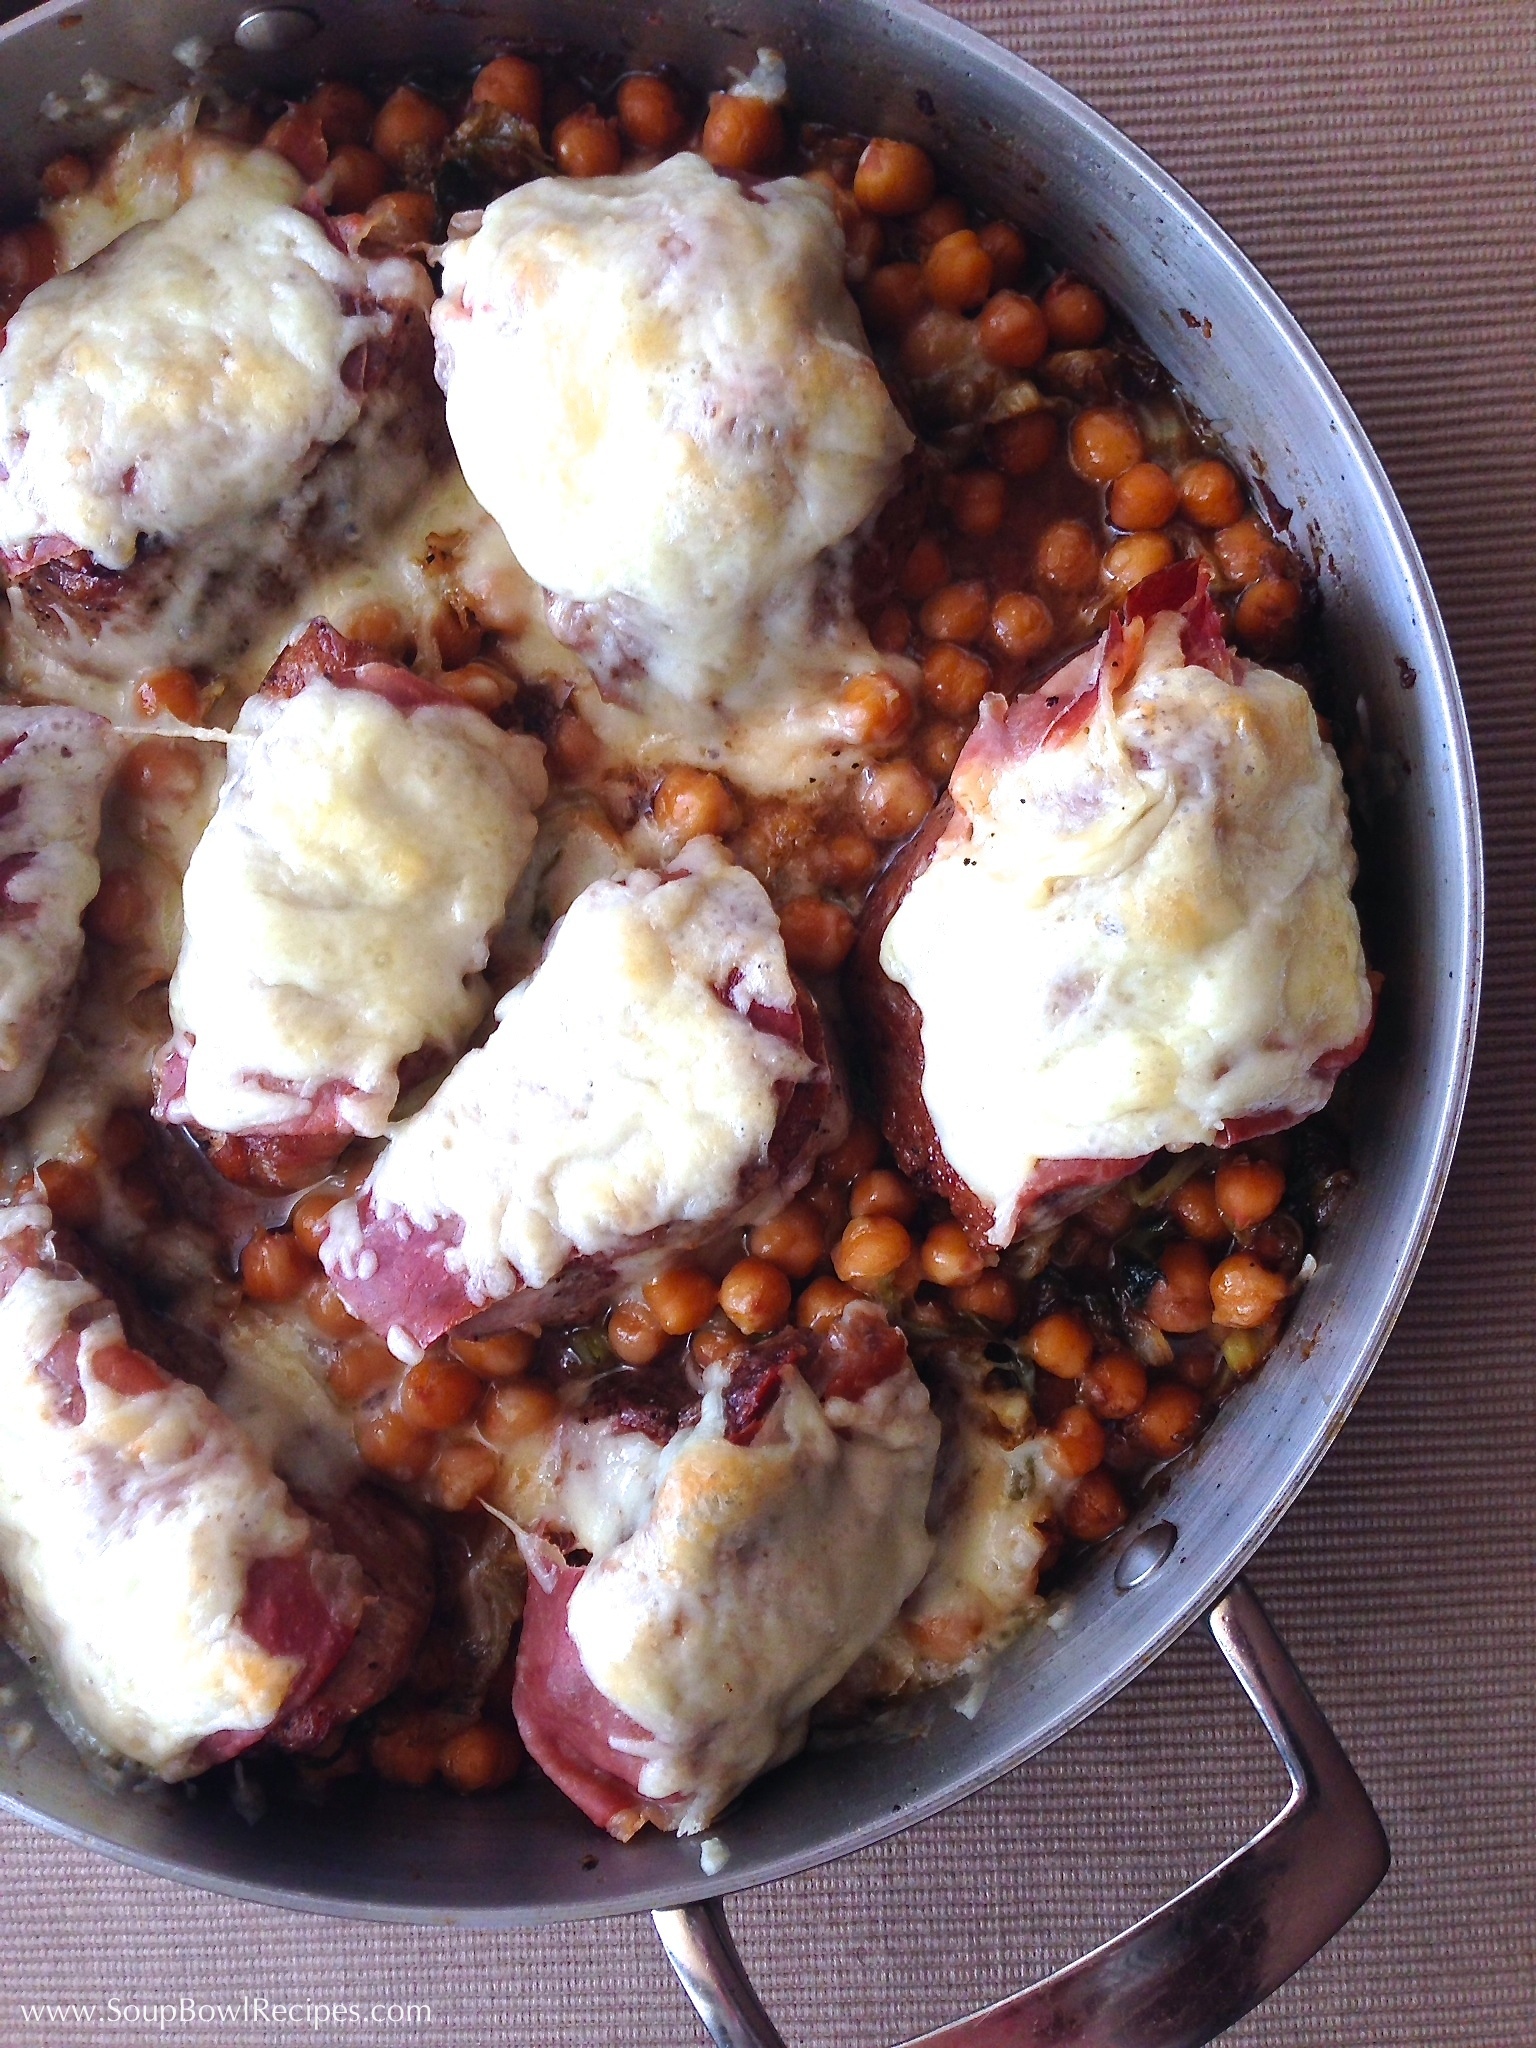
Chickpeas (a.k.a. garbanzo beans) can be a bit bland on their own, but when baked under tenderloins of sizzling, salty pork, they just explode with flavor. This dish is not only delicious and easy to make, but it’s elegant looking as well, which means you can prepare it for your family one night after work, or save it for the next time you have company. Either way, you’ll look like a rockstar in the kitchen! The original recipe called for using dry chickpeas, soaking them overnight, then cooking them on the stovetop for an hour prior to making the rest of the meal. That method sounded delicious, but, really?! It’s more time than I want to spend on a weeknight dinner (also, my local grocery store doesn’t carry dry chickpeas), so I altered the recipe to use canned chickpeas instead. With that being said, anyone who would like to try the long version gets extra credit – and you can find the recipe here. (Recipe slightly adapted from Fine Cooking.)

Pork Medallions with Chickpeas and Cabbage

Serves 6

  • 2 15-oz. cans of chickpeas, with canning liquid
  • 2 bay leaves
  • 2 sprigs fresh thyme
  • 2 cloves garlic, peeled and crushed
  • 2 1-lb. pork tenderloins
  • Kosher salt and fresh cracked black pepper
  • 2 Tbsp. unsalted butter
  • 1 Tbsp. olive oil
  • 1 medium yellow onion, halved lengthwise and thinly sliced crosswise
  • ½ small head Savoy cabbage, thinly sliced (6 to 7 cups)
  • 6 thin slices prosciutto di Parma (3½ oz.)
  • 6 oz. coarsely grated Italian fontina cheese (about 2 cups)

Position rack in the center of the oven and heat the oven to 425°F.

In a saucepan over medium heat, add chicpeas (with canning liquid) along with the bay leaves, thyme, and garlic. Heat until just starting to bubble, then reduce temperature to low and simmer for 20-40 minutes, or however long it takes you to prepare the rest of the dish. Drain, reserving ½ cup cooking liquid and garlic, discard herbs. Smash the garlic (it should be very soft, almost paste-like when smashed), chop, and set aside.

Meanwhile, trim and slice each tenderloin on the diagonal into 3 thick medallions (for a total of 6 medallions). Place each medallion on a cut side, and using your hands, gently press on each to flatten slightly. Season on both sides with salt and pepper.

Heat the butter and oil in a 12-inch oven proof skillet over medium-high heat until shimmering. Working in two batches, cook the pork, flipping once, until golden-brown, 2 to 3 minutes per side. Transfer to a plate and set aside.

Turn the heat down to medium and add the onion and ¼ tsp. salt. Cook, stirring often, until lightly browned, 5 to 6 minutes. Add the cabbage, ¼ tsp. salt, and ½ cup water. Stir, cover, turn the heat down to medium low, and cook, stirring occasionally, until the cabbage is tender, 15 to 20 minutes.

Stir in the chickpeas, reserved cooking liquid, and garlic and season to taste with salt and pepper. Arrange the pork (and any cooking juices that have accumulated on the plate) over the cabbage and chickpeas and top with each piece with a slice of prosciutto and a mound of grated fontina. Transfer the skillet to the oven and cook until the pork reaches 145°F on an instant-read meat thermometer, about 15-17 minutes. Let rest for 5 minutes before serving. Spoon chickpeas onto plate, then top with pork tenderloin.

Sidekick: Pair with a glass of Pinot Noir, Barolo, Syrah, or Chardonnay.

Beef Phở

Beef Phở

IMG_0084

Beef phở (pronounced fuh) is a traditional Vietnamese soup (typically made with beef although chicken and vegetable versions are also available), wide rice noodles, and served with a variety of garnishes. To me, there is nothing more comforting on a blustery winter day than sitting down to a steaming bowl of phở, slurping noodles off a pair of chopsticks, and feeling its warming effects spread to the ends of my fingers and the tips of my toes. The broth, steeped with spices and charred onions, is slightly sweet, highly flavorful, and wonderfully aromatic, which sets this soup apart from other “noodley” soups, as my toddler likes to call them. (If you don’t have time to make this somewhat labor intensive stock by hand, see the Shortcut at the end of the recipe for tips on how to quickly enhance store-bought stock.) Oh, and I promise next week’s soup will be an easy one. No really — chop a few ingredients, throw everything into a crockpot, then put your feet up and wait for the payoff! 

IMG_0427

(Sugar and spice and everything nice, that’s what phở is made of.)

Serves 6

 For the Stock:

  • 2 white or yellow onions
  • 1 hand of ginger root, about 6-inches long
  • 3 lbs. marrow bones
  • 2 lbs. oxtail
  • 1 lb. chuck roast, cut into 2-inch pieces
  • 1 lb. beef brisket
  • 2 cinnamon sticks
  • 5 whole star of anise
  • 6 whole cloves
  • 1 tsp. fennel seeds
  • 1 tsp. coriander seeds
  • 1 oz. yellow rock sugar (see Notes) or 2 Tbsp. Sugar in the Raw (or granulated sugar)
  • ¼ – ½ cup fish sauce, depending upon taste
  • Kosher salt
  • Fresh cracked black pepper

IMG_0712 

(Pictured from top: beef bones, oxtail, chuck roast)

 For the Soup:

  • 1 lb. rib eye, skirt, or flank steak, thinly sliced, seasoned with salt and pepper
  • 2 cups oyster mushrooms
  • 1 lb. Phở noodles (see Notes)

Garnishes for Serving:

  • 2 limes, cut into wedges
  • 3 cups bean sprouts
  • 1-2 cups fresh basil
  • 1-2 cups fresh cilantro
  • 4 green onions, thinly sliced
  • 2 Thai chilies (Very HOT!), serrano peppers (HOT!), or Jalapeños (kinda hot), thinly sliced
  • Chili sauce, such as Sriracha
  • Fish sauce and/or hosin sauce

IMG_4300

(A few phở garnishes.)

Directions:

Char Onions and Ginger

Charring the skins of the onions and ginger gives the broth an appealingly smoky quality that’s quintessential to phở. Follow one of these three charring methods:

  1. On an outdoor grill: Place onions and ginger over direct heat on high. Allow the skins to become black, then turn, continuing to char on all sides, 5-8 minutes.
  2. Over an indoor gas burner: Turn on exhaust fan. With a pair of kitchen tongs and working one at a time, hold onions and ginger over open flame until skins have blackened, then turn, continuing to char on all sides, 5-8 minutes. (If your kitchen tongs are metal, you may want to wear an oven mitt — trust me!)
  3. In an electric oven (pictured below): Turn oven on to broil. Place onions and ginger on a foil-lined roasting pan and place on an oven rack set 3-4 inches below the broiler element. Allow the skins to become black, then turn, continuing to char on all sides, about 20-25 minutes.

IMG_0068

The onions and ginger should be very dark and burned on the outside, yet soft and slightly cooked on the inside. (I swear the photo below isn’t one of my kitchen catastrophes – I meant to do this!)

IMG_0098

Peel onions and ginger, rinsing off any blackened bits. Cut into quarters and set aside.

IMG_0018

Make Stock

Add beef and bones to a large stock pot. Cover with water by 2-inches. Bring to a boil and continue to boil for 15 minutes. Dump water, beef, and bones into a colander set in the sink, allow to cool slightly. Rinse stockpot clean of any residue. Run cold water over beef & bones, and gently scrub any scum from the surface. This will eliminate cloudiness, leaving you with a crystal-clear broth. Beautiful!

IMG_0099

Return beef & bones to stockpot and cover with 5-6 quarts water (20-24 cups). Add onions, ginger, spices, sugar, ¼ cup fish sauce, and 1 Tbsp. salt and bring to a simmer. Continue to simmer for at least 5 hours, and up to all day, skimming any fat that rises to the surface. (Do not allow to boil otherwise your stock may become bitter.)

Once stock is done simmering, remove onions, ginger, and spices and discard. Gently scoop beef & bones from stock and set aside. Pour stock through a fine-mesh sieve set over a large storage container. Refrigerate, uncovered, overnight.

Carefully remove any meat and connective tissue from the bones and oxtail and place in a storage container, cover. Slice brisket and place in a separate storage container, cover. In a third storage container, add the beef chuck. Cover, and refrigerate all three. Discard bones.

After the stock has cooled overnight, use a slotted spoon to gently remove the layer of fat that has risen to the top, discard.

IMG_0091

You may end up with more stock and beef than you need for 6 servings. Both stock and beef can be refrigerated separately for up to three days, or frozen for 4-5 months (see tips on freezing stock in Homemade Stocks).

Make the Soup

Evenly divide garnishes (bean sprouts, lime wedges, fresh herbs, green onions, and chiles) among 6 small plates.

Microwave reserved beef until warm, and place in three separate serving bowls.

In a large stock pot, bring stock to a simmer. Test for seasoning and add more fish sauce and salt & pepper if needed.

Add mushrooms to stock and continue to simmer until soft, about 5-6 minutes. Add thinly sliced beef (rib eye, skirt, or flank steak) to stock and cook for 1 minute, until rare.

Cook phở noodles per package instructions, strain and divide among 6 bowls.

Ladle stock, thinly sliced beef, and mushrooms into bowls over top of phở noodles.

IMG_4406

Place serving bowls of reserved beef on the table, allowing guest to add what they like. Serve with Sriracha, fish and/or hosin sauce, and a plate of garnish for each guest.

IMG_0087

Notes:

  • Yellow rock sugar can be found in many Asian markets or online, however, you can always substitute Sugar in the Raw or regular granulated sugar.
  • Phở noodles can also be found in many Asian markets, however, if they’re unavailable in your area, look for another style of Asian noodle (see examples pictured below). And if you’re really in a pinch, you can always use instant ramen noodles.

IMG_0089

Shortcut: In leu of making your own stock, add 12-16 cups of store-bought stock (about 2 cups per person) to a large stockpot. Add 1 cinnamon stick, 3 whole star anise, 2-inches peeled and sliced ginger root, 6 whole cloves, 2 tsp. coriander seeds, 1 tsp. fennel seeds, 1-2 tsp. sugar, 2-3 Tbsp. fish sauce (plus more for seasoning later) and bring to a simmer. Continue to simmer for 15-20 minutes. Scoop out spices and discard. Continue with directions: Make the Soup.

Sidekick: The choice beverage selection with this slightly sweet, somewhat spicy dish is a Vietnamese beer (which can be hard to find), so try looking for other more commonly found Asian beers such as Sapporo. For wine drinkers, a chilled glass of Gewürztraminer or Riesling would also pair well.

Your best bet for finding a Vietnamese beer is at a local Asian Market or World Market.

Stuff My Kid Eats – Pan-Seared Sausage with Lady Apples and Watercress

Stuff My Kid Eats

IMG_0593

Has there ever been a more beautiful union than that of sweet and savory? The unlikely marriage of salt and confection has inspired many food favorites: chocolate covered pretzels, peanut butter and jelly sandwiches, Rocky Road ice cream, corn dogs, fruit and cheese, pineapple pizza (my toddler’s pick) — the list goes on and on. So with Valentine’s Day hot on everybodys’ minds, why not put away your ideas of “what works” and go with your gut! After all, it worked with my toddler and her cat.*

Pan-Seared Sausage with Lady Apples and Watercress 

IMG_0505

Aside from pineapple pizza, this is my toddler’s favorite meal. The ultimate sweet and savory matrimony: Italian sausage, caramelized apples, and watercress — this dish has all the makings for a family favorite! (Recipe slightly adapted from Bon Appétit)

Serves 4

1 Tbsp. olive oil
1 lb. lady apples, halved through stem ends (if unavailable, use pink lady or fuji apples)
1 ½ lb. sweet Italian sausage
½ cup dry white wine
4 Tbsp. white wine vinegar
1 bunch watercress, trimmed (about 6 cups)
Kosher salt
Fresh ground black pepper

Heat oil in a large cast-iron or other heavy skillet over medium-high heat. Add apples, cut side down, and cook, turning occasionally until golden brown, 5-8 minutes.

Prick sausages with a fork, add to skillet with apples, and cook, turning occasionally, until browned. 10-12 minutes. Add wine and vinegar to skillet. Bring to a boil, reduce heat, and simmer until thickened (liquid should coat a spoon), about 4 minutes. Add watercress and toss to coat, season with salt and pepper.

Serve with pan juices spooned over.

Sidekicks:

  • A fruity Zinfandel and an off-dry German Riesling pair well with the sweet apples.
  • Crispy oven potatoes are an excellent starch to help soak up the delicious pan juices you don’t want to go to waste (recipe below).

Crispy Oven Potatoes

IMG_0510

I make these potatoes a few times a month and always change up the seasonings to match the flavor of the meal. For this dish, I like smoked paprika and dried oregano, which off-set the sweetness of the Italian sausage and lady apples, but you can use thyme and fennel, rosemary and parsley — or whatever else suits your fancy. 

Serves 4

  • 8-10 Yukon Gold potatoes, quartered
  • 2 Tbsp. olive oil
  • 1 tsp. herbs d’provence
  • ½ tsp. smoked paprika
  • Kosher salt and fresh cracked black pepper to taste

Preheat oven to 375°F. Lightly mist a baking sheet with cooking spray. In a bowl, mix all ingredients until combined. Spread seasoned potatoes evenly on sheet and bake for 20-25 minutes, tossing half way through.

* Photo: True Love: The Toddler and The Cat

IMG_3903

Zesty Tomato Soup with Balsamic Reduction, Fried Sage; Open-Face Tuna Melt

Zesty Tomato Soup with Balsamic Reduction and Fried Sage Leaf
Served with Tuna Melt Toast and Arugula Salad

Zesty Tomato Soup with Balsamic Reduction and Fried Sage

This is one of my all-time favorite soup recipes. My mom used to serve a version of this every Christmas, and after a while, the family started referring to it as, “Christmas Soup.” The recipe has evolved over the years with the addition of orange zest and balsamic vinegar, and is now no longer relegated to being served exclusively on December 25th. (Note: the recipe can easily be adapted to suit a vegetarian by substituting vegetable broth for the chicken stock.)

Serves 6

1 Tbsp. olive oil
2 Tbsp. butter, cut into cubes
1 white onion, coarsely chopped
2 celery stalks, coarsely chopped
2 carrots, peeled and coarsely chopped
4 cloves garlic, peeled and slightly crushed
3 fresh sage leaves finely chopped
28 oz. can peeled whole tomatoes, drained, liquid reserved
1 ½ tsp. freshly grated orange zest (about 1 large orange)
2 bay leaves
4 cups chicken or vegetable stock (see recipe in Homemade Stocks)
6 oz. can tomato paste
8 whole cloves
2 Tbsp. brown sugar
1 Tbsp. balsamic vinegar
1 ¼ cup whole milk
2 tsp. Kosher salt, plus more to taste
Fresh ground black pepper to taste

Preheat oven to 325°. In a large glass baking dish, combine onion, celery, carrots, garlic, orange zest, chopped sage leaves, bay leaves, drained tomatoes, and olive oil. Season with 1 tsp. salt and dot the top with butter cubes (Figure 1). Bake for 75 minutes, stirring half way through.

Figure 1 – Slow roasting tomatoes and vegetables

Slow roasted tomatoes

Remove baking dish from oven and let cool slightly. Find bay leaves and set aside. Pour tomato/vegetable mixture into a soup pot with ¼ cup reserved tomato juice, and using a hand blender, purée until smooth (or working in two batches, purée tomato/vegetable mixture and ¼ cup reserved tomato juice in a blender or food processor until smooth, then pour into soup pot). Use more tomato juice to thin if necessary.

Add tomato paste, chicken stock, balsamic vinegar, brown sugar, 1 tsp. salt, fresh cracked pepper, whole cloves, and reserved bay leaves to tomato/vegetable purée. Simmer for 1 hour partially covered, stirring occasionally, until soup thickens. Add milk and simmer for an additional 15 minutes. With a slotted spoon, remove bay leaves and whole cloves, discard. Season with more salt and pepper if desired.

When ready to serve, ladle soup into pre-warmed bowls, drizzle with balsamic reduction and top with a fried sage leaf.

Balsamic Reduction:

1 cup balsamic vinegar
1 tsp. honey
1 garlic clove, peeled
1 sage leaf
2 whole cloves

In a heavy sauce pan, bring all ingredients to a boil, then immediately reduce to a simmer. Continue to simmer, watching closely, until liquid is reduced to ¼ cup, about 30-40 minutes. Pour reduction through a fine-mesh sieve and allow to cool before using.

Fried Sage Leaves:

Fried Sage Leaves

6-8 fresh sage leaves
¼ cup olive oil
Flaky sea salt, such as Maldon

In a heavy skillet over medium-high heat, heat oil until shimmering. Gently place sage leaves in oil and fry until leaves stop bubbling and are crispy but not burned, about 8-10 seconds. Transfer leaves to a paper towel. Sprinkle with salt.

Sidekicks: 

  • Consider serving a cup of Zesty Tomato Soup with an Open-Face Tuna Melt: Slice French bread on the diagonal. Drain a 12 oz. can of tunafish and combine in a bowl with ¼ cup mayonnaise, 2 Tbsp. dijon mustard, 1 tsp. soy sauce, 1 tsp. worcestershire sauce, and 1 finely chopped shallot. Season with salt and pepper. Spread a heaping spoonful of tuna mixture on the bread, and cover with a slice of sharp cheddar cheese. Place slices on a cookie sheet and broil until cheese has melted and is bubbly at the edges. Top with a handful of arugula dressed with equal parts olive oil and white wine vinegar, season with salt and pepper and enjoy!
  • This soup pairs well with a chilled glass of Sauvignon Blanc or Chardonnay.

Shortcuts:

  • Substitute store-bought stock for homemade stock.
  • Instead of roasting tomatoes and vegetables in the oven, replace 28 oz. can of whole peeled tomatoes with a 28 oz. can of fire roasted whole peeled tomatoes. Start by sautéing the onion, carrots, celery, and garlic in butter and oil directly in your soup pot. Once vegetables are soft and starting to brown, about 10-15 minutes, add the drained tomatoes, orange zest, and herbs. Cook for 15 minutes, then allow to cool slightly before following the instructions on puréeing.

Stuff My Kid Eats – Lemony Pasta with Tuna Sauce

Stuff My Kid Eats

Stuff My Kid Eats

(Photo credit: Audrey Kranz)

I have been fortunate enough to have a toddler who is relatively adventurous in the foods she will try — and often even like. This is not to say that we don’t have our moments of refusing to eat, declaring something “yucky” simply because it’s brown, or ending a meal in tears; she is 2 years old, after all! But almost without fail, I can count on her to at least taste everything I put in front of her, even if she won’t finish it. When I do find a dish that is particularly popular with her, I feel like SuperMom and do a private little victory dance in my chair across the table from her.

In this weekly segment, I’ll be sharing quick, easy, healthy recipes that break away from the mac-‘n-cheese/quesadilla/chicken nugget rut that’s so easy to get stuck in. All of the meals I post here are great for kids, and delicious for adults as well. Good luck and enjoy!

Lemony Pasta with Tuna Sauce and Arugula

Lemony Pasta with Tuna Sauce

I found this recipe in one of my husband’s Men’s Health magazines over the summer (I’ll let you draw your own conclusions on the similarity of a grown man’s pallet to that of a toddler’s.) I was able to throw this meal together in 15 minutes, then crossed my fingers that it was something my daughter would eat — she did, and now it’s one of her favorites. Hallelujuah!

Serves 4

1 lemon
8 ounces radiatore pasta
2 – 5 oz. cans of tuna in olive oil (see Tips*)
2 canned anchovies (even if you don’t like anchovies, don’t omit them! They really enhance the flavor.)
¼ tsp. red-pepper flakes, divided (see Tips*)
5 cups baby arugula
¼ cup fresh grated parmesan cheese
Kosher salt and fresh cracked black pepper to taste

Juice and zest lemon. Cook pasta per package instructions; drain, saving ½ cup of cooking water.

While the pasta cooks, drain tuna, saving 3 Tbsp. of the oil. In a blender or food processor, combine tuna, reserved oil, lemon juice, anchovies, and ⅛ tsp. red-pepper flakes; process until smooth.

In a large bowl, toss the hot drained pasta with tuna sauce (thin with pasta water if necessary). Add arugula, lemon zest, salt & pepper, and remaining red-pepper flakes (see Tips*). Serve topped with fresh grated parmesan cheese and cracked pepper.

*Tips:

  • I waited to add the final ⅛ tsp. red-pepper flakes until after I dished my toddler’s serving to save her delicate tastebuds from too much heat (if there is such a thing).
  • To make this a heartier meal, buy an additional can of tuna, drain, then add chunked tuna to the finished pasta.
  • Look for Genova brand tuna, if available (pictured below).

Genova Tuna

Food for the New Year: Healthy Snacks

Food for the New Year: Healthy Snacks

Healthy Snacks


I’m not a huge fan of New Year’s resolutions, but every January I find myself saying, “I’m going to live healthier this year.” Although we already eat well balanced meals in our home, and I workout (occasionally), I struggle with the mid-day snacking and saying no to the bowl of microwave popcorn my husband likes to make after dinner. With that in mind, I’ve decided to stock our pantry with smart alternatives to the cheddar cheese crackers that somehow find their way onto my shelves every week. Now, instead of reaching for a bag of fat-laden snack food, I’ll be baking up a crispy batch of kale chips instead!

Below are some suggestions for low-calorie, high flavor tidbits to help you curb your appetite between meals, refuel after a workout, or beat the midnight munchies.

Note: With the exception of the Low-Fat Deviled Eggs (which she said made her tongue “ouchy”), all of these snacks have been taste-tested and toddler approved.

Low-Fat Deviled Eggs with a Kick!

Low-Fat Deviled Eggs

Normally considered a picnic splurge, this low-fat version of the classic deviled egg can be enjoyed all year long without the guilt — or the ants! The addition of horseradish kicks up the flavor to help curb your appetite.

Serves 6 (serving size: 2 halves)

6 eggs
¼ cup low fat cottage cheese
2 Tbsp. low fat mayonnaise
1 Tbsp. prepared horseradish
1 tsp. dijon mustard
1 tsp. white wine vinegar
6 small celery leaves for serving (optional)
Kosher salt

Place eggs in a single layer in a saucepan; cover with water. Bring to a boil over medium-high and cook for 12 minutes. Remove eggs from heat, and place in a bowl of ice-cold water. Let stand until cool enough to handle before peeling.

While eggs are cooling, mix cottage cheese and next 4 ingredients in a bowl with an hand blender, or in a small food processor until smooth.

Peel eggs and discard shells. With a wet knife, cut eggs lengthwise and scoop out yolk. Add egg yolks to cottage cheese mixture and stir until combined. Season with salt.

Fill eggs with yolk mixture and top with a celery leaf.

Deviled eggs can be covered and stored in the refrigerator for 1 day.

Kale Chips

Kale Chips

Kale is a wonderful source of calcium; potassium; vitamins A, C, and K; and provides anti-inflammatory benefits for the body — so it’s a great snack to counter some of those aches and pains you’ll likely experience from your new workout routine.

Serving size: It’s kale — eat as much as you want!

2 bunches of curly leaf kale (green or red, or a colorful mix of the two)
4 Tbsp. olive oil
½ tsp. Kosher salt
¼ tsp. fresh cracked pepper
½ tsp. of flaky sea salt, such as Maldon, or another of your favorite savory seasonings (eg. smoked paprika, chili powder, garlic powder, or Johnny’s Seasoning Salt)

Preheat oven to 350° and lightly spray three rimmed baking sheets with non-stick cooking spray. Fold the kale in half lengthwise, then with a sharp knife, cut the stem away from the leaves. Tear kale into 2″x2″ pieces, wash with cold water, lay flat on a clean kitchen towel and thoroughly pat dry. In a bowl, toss kale with olive oil and salt, then spread in a single layer onto baking sheets. Make sure the kale pieces are not too crowded, otherwise they will steam rather than dry out, so use a fourth sheet if necessary.

Sprinkle pepper evenly over kale, then bake for 15 minutes, or until crispy but not burned. Remove from oven and sprinkle with flaky sea salt or other desired seasoning. If there are any soft pieces of kale remaining, return to the oven and bake for an additional 2-4 minutes.

Let cool before eating. Kale can be stored in an airtight container for up to 4 days. Do not refrigerate.

Edamame

Edamame

These tasty little soy beans are packed full of protein, fiber, calcium, iron, and many of your essential daily vitamins and minerals, which just goes to show that good things really do come in small packages! (Edamame can be found in the freezer section of your grocery store, usually with the frozen vegetables. Look for edamame in their pods.)

Serves 2 (serving size: 1 ⅛ cup edamame)

2 ¼ cup edamame in their pods, cooked per package instructions
1 tsp. flaky sea salt (such as Maldon)

Place cooked edamame in a bowl and sprinkle with sea salt. With your teeth, squeeze soy beans from pods directly into mouth, discard pods. Smile. Repeat.

Quick Pickled Veggies

Quick Pickled Veggies

Nothing satisfies my munchies more than this crisp, tart salad. Try it by itself or as a lunchtime accompaniment to a healthy, low-fat tuna sandwich.

Serves 2 (serving size: 1 ½ cup salad)

3 cups mixed vegetables, julienned (carrots, celery, bell peppers, broccoli stems, cabbage, or whatever else you like)
1 Tbsp. olive oil
2 Tbsp. rice wine vinegar
⅛ tsp. ground coriander (optional)
½ tsp. Kosher salt
Fresh cracked black pepper to taste

Place veggies in a serving bowl. In a measuring cup, whisk together remaining ingredients until thoroughly combined. Pour vinaigrette over veggies, toss and let stand for 10 minutes. Toss again, then serve.

Shortcut: Bags of precut matchstick vegetables are available in the produce section of most grocery stores.

Blue Cheese and Almond Dates

Blue Cheese Almond Dates

Dates and blue cheese have been found to benefit the intestinal tract, so swap out your evening dessert for these tasty little treats and you’ll not only beat your sweet tooth, you’ll go to bed with a happy stomach as well.

Serves 4 (serving size: 3 dates)

12 large pitted dates
4 Tbsp. blue cheese
2 Tbsp. slivered almonds, coarsely chopped

Slice dates open with a sharp knife. Fill each date with 1 tsp. of blue cheese, then lightly squeeze date closed. Roll open side of date in diced almonds so that they cover the blue cheese. Enjoy after dinner with an ounce of your favorite digestif, such as brandy, grappa, ouzo, or dry sherry.

Classic Chicken Noodle Soup

Homemade Chicken Noodle Soup

Classic Chicken Noodle Soup

This is the time of year when many of us fall ill with the flu, so this season, instead of downing a bottle of NyQuil ®, why not treat your symptoms the way our grandmothers did – with chicken soup!

Serves 6-8

1 Tbsp. unsalted butter
2 Tbsp. olive oil
2 cups yellow onion, diced (about 1 small onion)
2 cups carrots, peeled and sliced into rounds (about 4 carrots)
1 ¼ cup celery, sliced (about 4 celery stalks)
2 garlic cloves, minced
2 tsp. Kosher salt, divided, plus more for seasoning
2 tsp. dry mustard
½ tsp. celery salt
1 cup dry white wine, such as Pinot Gris or Sauvignon Blanc
8 cups homemade chicken stock (see recipe in Homemade Stocks)
1 bay leaf
4 sprigs fresh Italian parsley
3 sprigs fresh thyme
2 sprigs fresh oregano, plus 2 Tbsp. chopped oregano leaves for serving
2 cups reserved chicken from chicken stock recipe, chopped, mix of white and dark meat
2 cups dry egg noodles
Fresh cracked black pepper to taste

Heat butter and oil in a large soup pot over medium-high heat until butter has melted. Add onion, carrots, and celery and sauté until veggies have softened and onions become translucent but not brown, about 8-10 minutes. Add dry mustard, celery salt, 1 tsp. Kosher salt, and garlic. Cook until fragrant, about 1 minute. Add wine and cook until liquid has reduced by half, about 2-4 minutes.

With a 4″ piece of cotton kitchen twine, create an herb sachet (sachet d’ épices) by tying together bay leaf, and sprigs of parsley, thyme, and oregano (Figure 1). Add chicken stock and sachet to soup pot. Bring to a boil, then immediately reduce heat to a simmer. Simmer for 30 minutes, partially covered.

Figure 1 – sachet d’ épices

Sachet

In a separate pot, bring 4 cups of water to a boil with 1 tsp. salt. Once boiling, add egg noodles and continue to cook until noodles are al dente, about 5-8 minutes. Pour noodles into a colander and run cold water over them to stop the cooking process. Set aside.

After the 30-minute simmer is completed, add chicken and noodles to soup pot and continue to simmer for an additional 20-30 minutes. Remove herb sachet from pot and season with salt and pepper.

When ready to serve, ladle soup into pre-warmed bowls and top with a squeeze of lemon and a sprinkle of fresh chopped oregano.

Soup can be stored in refrigerator for 3-5 days and frozen for up to 3 months.

Note: After refrigeration, the soup may accumulate a layer of fat on the top, remove with a slotted spoon and discard before reheating.

Sidekicks: 

  • There’s probably not a person in the world who would argue that the best accompaniment to chicken noodle soup is a good old fashioned grilled cheese sandwich – my recommendation is using a couple pieces of sourdough bread, unsalted butter, and a slice each of sharp cheddar and Muenster cheese.
  • Serve with a glass of Chardonnay, and you’ve got yourself a meal to beat any ailment!

Shortcuts:

  • Replace homemade chicken stock with store-bought stock.
  • Instead of using reserved chicken from stock recipe, buy a pre-roasted whole chicken (found in the deli department of most grocery stores), cut meat away from bone and dice. Use 2 cups for soup, then reserve remaining chicken for another use.