With Cinco de Mayo only cinco days away, it’s time you started thinking about your party plans. You know, and I know, and all the other sane people on the planet know that every Mexican restaurant from here to Jupiter is going to be jammed packed with people fighting for a table. Even if you were forward-thinking enough to make a reservation, you’re still gonna wait a long time to be seated. Sure it’s fun to go out and celebrate with tequila-guzzling, sombrero-wearing, chips-and-salsa-munching party animals, but doesn’t it sound more fun to have a few friends over for a casual party where you can enjoy good food, good conversation, and still make it to work the next day (btw, Cinco de Mayo falls on a Monday this year, yeesh!)? Below is a quick and easy Cinco de Mayo menu that you can prep the day before, then throw into the crockpot to cook while you bide your time at work waiting for the festivities to begin.
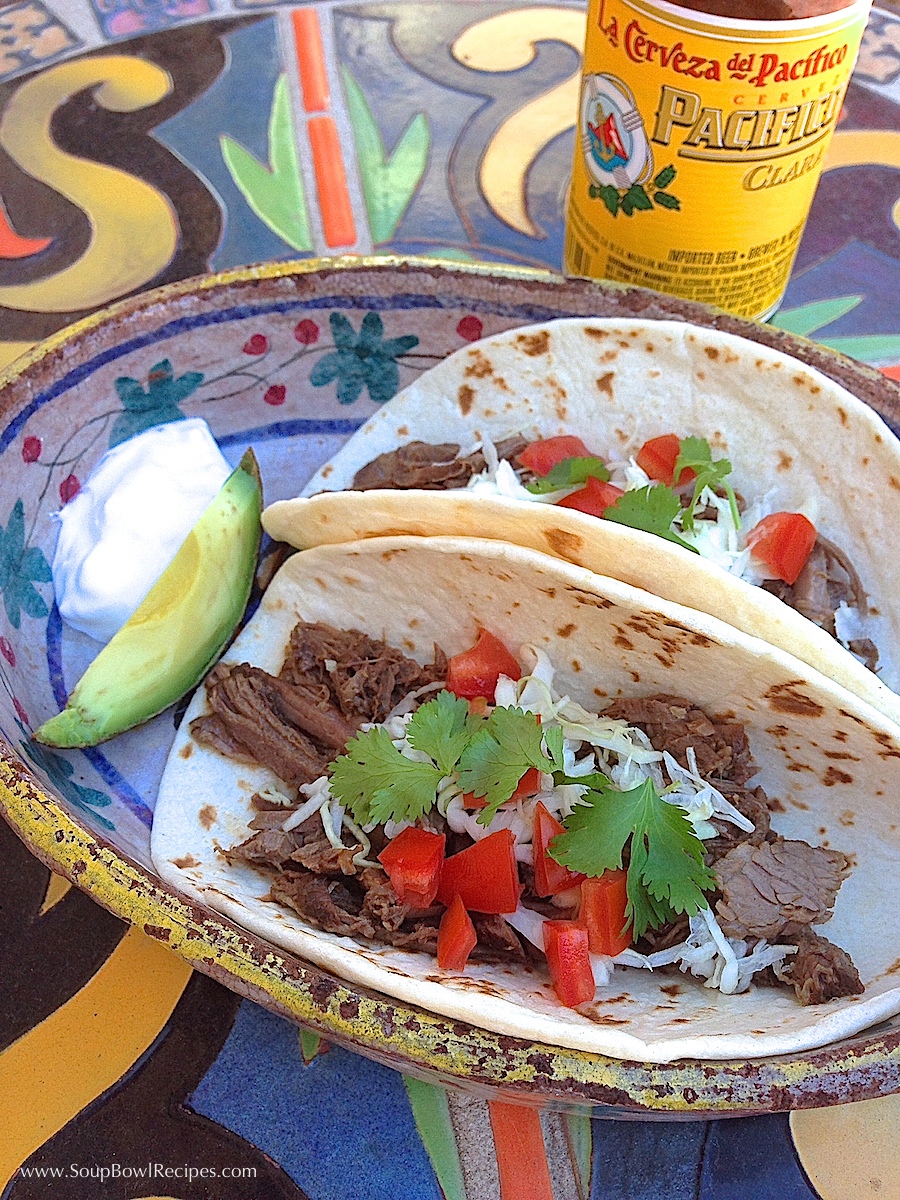
Smoky Beef Brisket Street Tacos
Also known as carne deshebrads, these super easy, super tasty tacos take a couple minutes to prepare, and even less time to vanish. Seriously, beware because they are highly addictive and will be requested by family and friends for every occasion from here on out. Consider yourself warned! Just don’t forget to marinate the brisket overnight so that it can reach its full flavor potential. (Recipe slightly adapted from Muy Bueno cookbook, by way of my aunt, by way of her daughter-in-law)
Serves 4-8
Tacos
- 2-4 lbs. beef brisket, fat trimmed (½ lb. per person)
- 2 oz. brisket marinade, (preferably Claude’s Brisket Marinade Sauce), or 2 tsp. liquid smoke per pound of brisket
- 2 bay leaves
- 12 oz. beer (preferably Blue Moon)
- Kosher salt to taste
- Fresh cracked black pepper to taste
- 8-16 corn tortilla, warmed (about 2 per person)
Toppings (choose any combination of the following or add your own)
- 1-2 cups crumbled or shredded Mexican cheese, such as cotija or queso blanco, or another cheese
- 1 cup Crema Mexicana or sour cream
- 1 cup fresh cilantro leaves, torn
- 1-2 cup white onions, diced
- 1-2 cups fresh tomatoes, diced
- 2-4 avocados, sliced
- 3-4 cups shredded cabbage or lettuce
- 2-3 limes, cut into wedges
- Lots of pico de gallo/salsa
The night before:
Place all of the taco ingredients (except tortillas) into the baking dish of crockpot or slow cooker, then cover and refrigerate overnight to allow the brisket to marinate.
Chop and prepare all the taco toppings (except for the avocado which will turn brown), cover and refrigerate.
The day of:
Place baking dish in the crockpot and set to cook on LOW for 8-10 hours or HIGH for 4-6 hours.
About 30-mintues before the brisket has finished cooking, slice the avocado and remove the other toppings from the refrigerator. Also, warm the tortillas by stacking 5 of them on top of each other, then wrap in tin foil and place in an oven preheated to 350° for 15-20 minutes (you can warm multiple packets of 5 tortillas at the same.)
Remove the brisket from the crockpot and place on a large serving platter. With two forks, shred the meat and drizzle a couple tablespoons of cooking liquid over top.
Set out toppings and allow guests to build their own tacos.
Sidekicks:

- Serve tacos alongside Mexican rice, and guacamole with chips.
- With this meal you have plenty of wonderful thirst-quenching companions. Serve with Mexican beer such as Pacifico, Modelo, Sol, Dos Equis, Victoria, or Carta Blanca, to name half-a-dozen, and/or a pitcher (or three) of homemade strawberry-watermelon daiquiris.
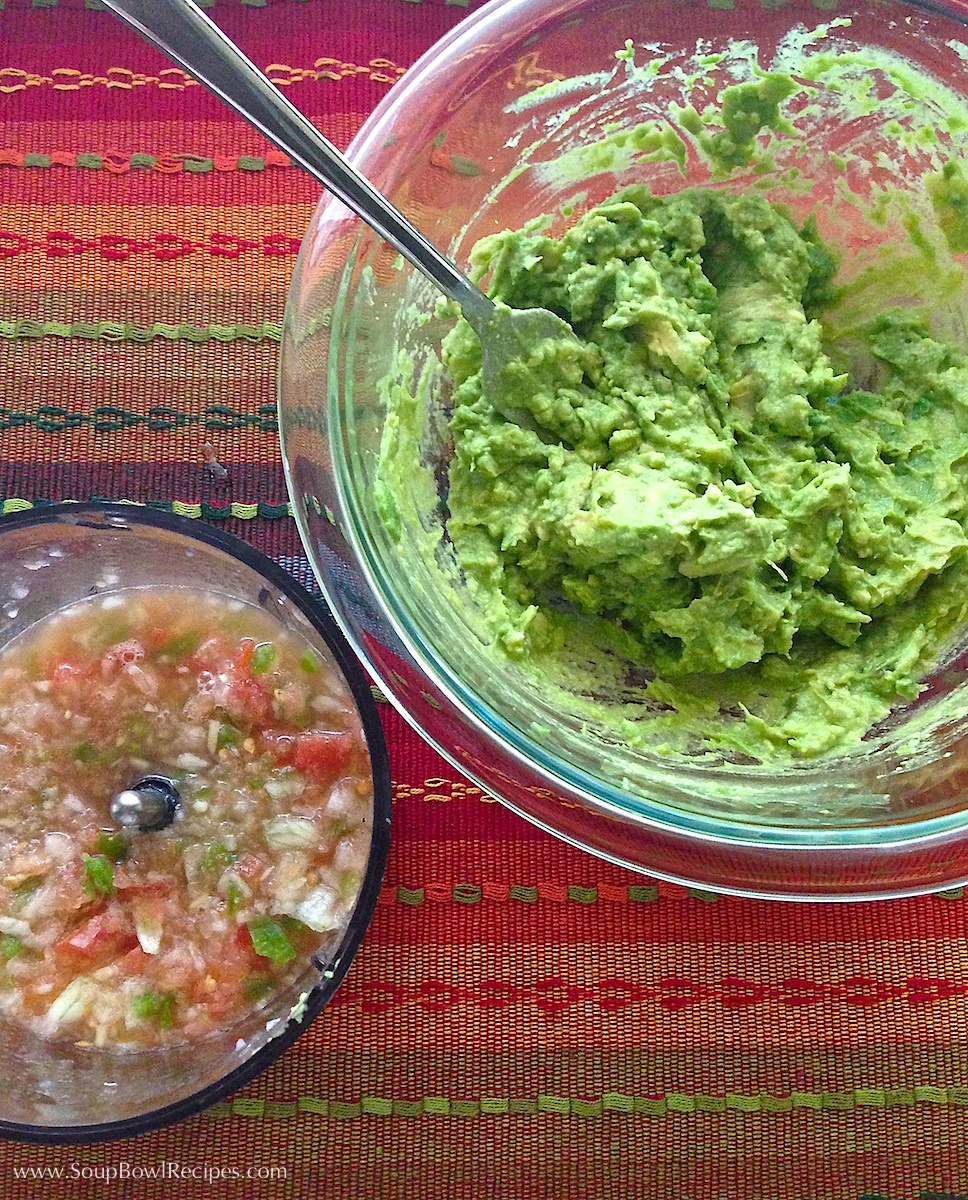
Guacamole

Guacamole
- 3 ripe avocados
- ½ tomato, seeds removed, diced
- ¼ white onion, diced
- 1 small jalapeño, seeds removed, minced
- the juice of 1 lime
- 4 sprigs fresh cilantro, finely chopped
- Kosher salt and fresh cracked black pepper to taste
- 2-3 dashes hot sauce (optional)
Cut the avocados in half and remove pit. Scoop out avocado from the peel, put in a medium bowl. Mash avocado with a fork until slightly smooth with some chunks of avocado left.
Add tomato, onion, jalapeño, and lime juice. Stir until combined, then season with salt & pepper, and a few dashes of hot sauce if you’d like. Serve with tortilla chips.
*If you have a small food processor, you can use it to chop the ½ tomato, ¼ white onion, jalapeño, and lime juice until chunky, then add it to the mashed avocado. Or, for a super quick version, add ½ cup jarred salsa to mashed avocado and mix until combined.
Guacamole is best served fresh, but if you do refrigerate it, place a piece of plastic wrap directly on top of guacamole, the cover the entire bowl with an additional piece of plastic wrap.

Mexican Rice

Mexican Rice
Serves 6-8
- 2 Tbsp. olive or vegetable oil
- 1 onion, finely diced
- 1 green pepper, finely diced
- 2 garlic cloves, peeled and minced
- 2 cups dry long-grain white rice
- 1½ cups spicy tomato juice (2 – 5.5oz cans of V8)
- 2 cups chicken stock (see recipe in Homemade Stocks)
- 1 cup fresh or frozen (thawed) peas
- 1 cup diced tomatoes, seeds removed
- Kosher salt and fresh cracked black pepper to taste
- chili powder (optional)
- 4-5 sprigs fresh cilantro, finely chopped
In a large, straight-sided skillet, heat oil until shimmering. Add onion and pepper and sauté until soft and onion begins to become translucent, about 5-8 minutes. Add garlic and cook until just fragrant, about 1 minute. Add rice and cook until it begins to toast, about 1-2 minutes.
Add tomato juice and chicken stock and bring to a boil, stirring occasionally. Once liquid begins to boil, immediately reduce heat to low and simmer, covered, for 20 minutes, or until rice is soft but not mushy.
Add peas and tomatoes and cook, stirring, for 1-2 minutes. Season with salt & pepper and chili powder, if you like it extra spicy.
Transfer to a large serving bowl and sprinkle with cilantro. Serve hot.
*Rice can be made the day before, refrigerated, then quickly reheated in the microwave the day of the party.
Strawberry-Watermelon Daiquiris
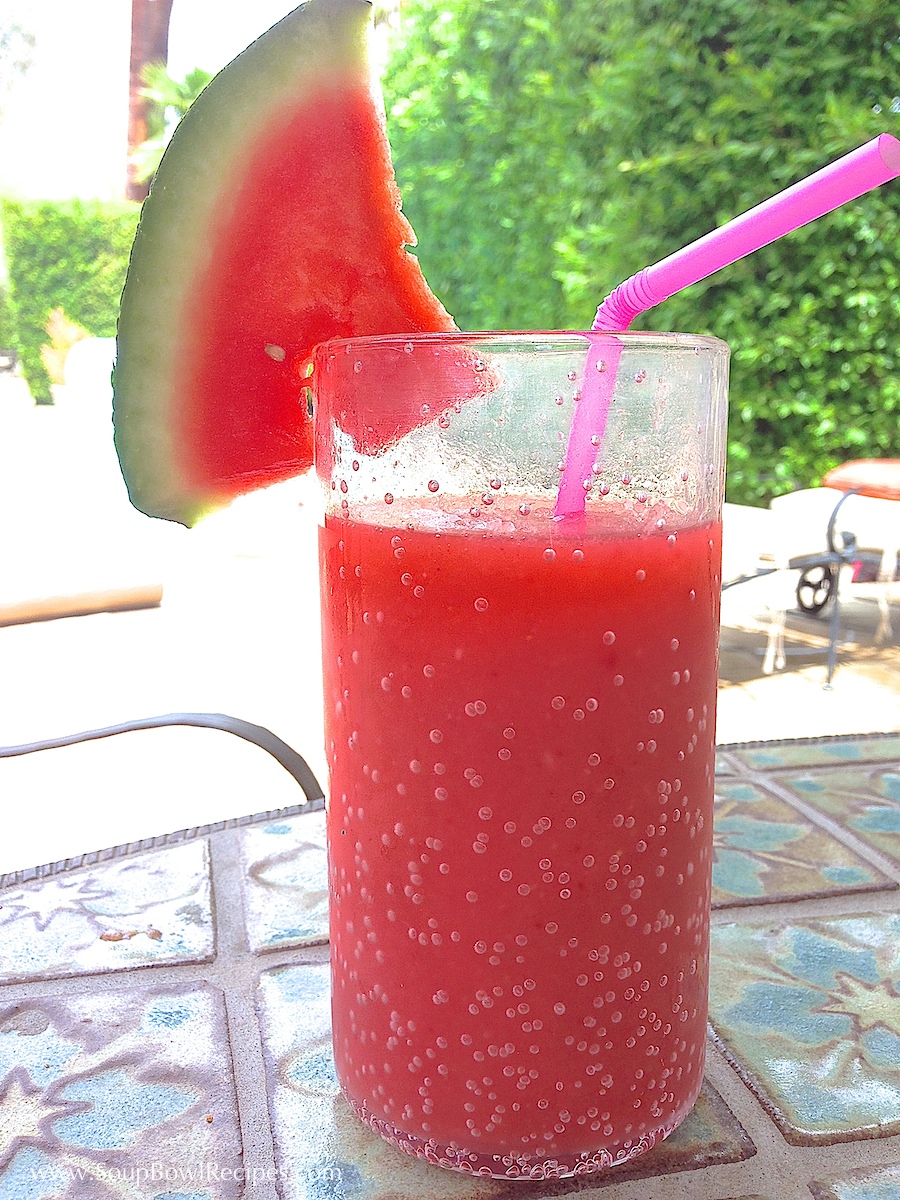
The thing I always hate about making frozen drinks at home is that unless you own a Vitamix (which I desperately want but feel bad about dipping into the Toddler’s college fund to buy), I always end up with huge chunks of unblended ice that clog up my straw. By pre-freezing the watermelon for a few minutes and using frozen strawberries, I’ve found that I can bypass those pesky ice cubes altogether and still get the creamy, frosty effect that you’d get from your favorite Mexican restaurant.
Strawberry-Watermelon Daiquiris
Serves 4
- 2 cups peeled, seeded, and cubed watermelon
- 2 cups frozen strawberries
- ½ cup light rum
- ¼ cup fresh lime juice
- ¼ cup triple sec
- ¼ simple syrup *
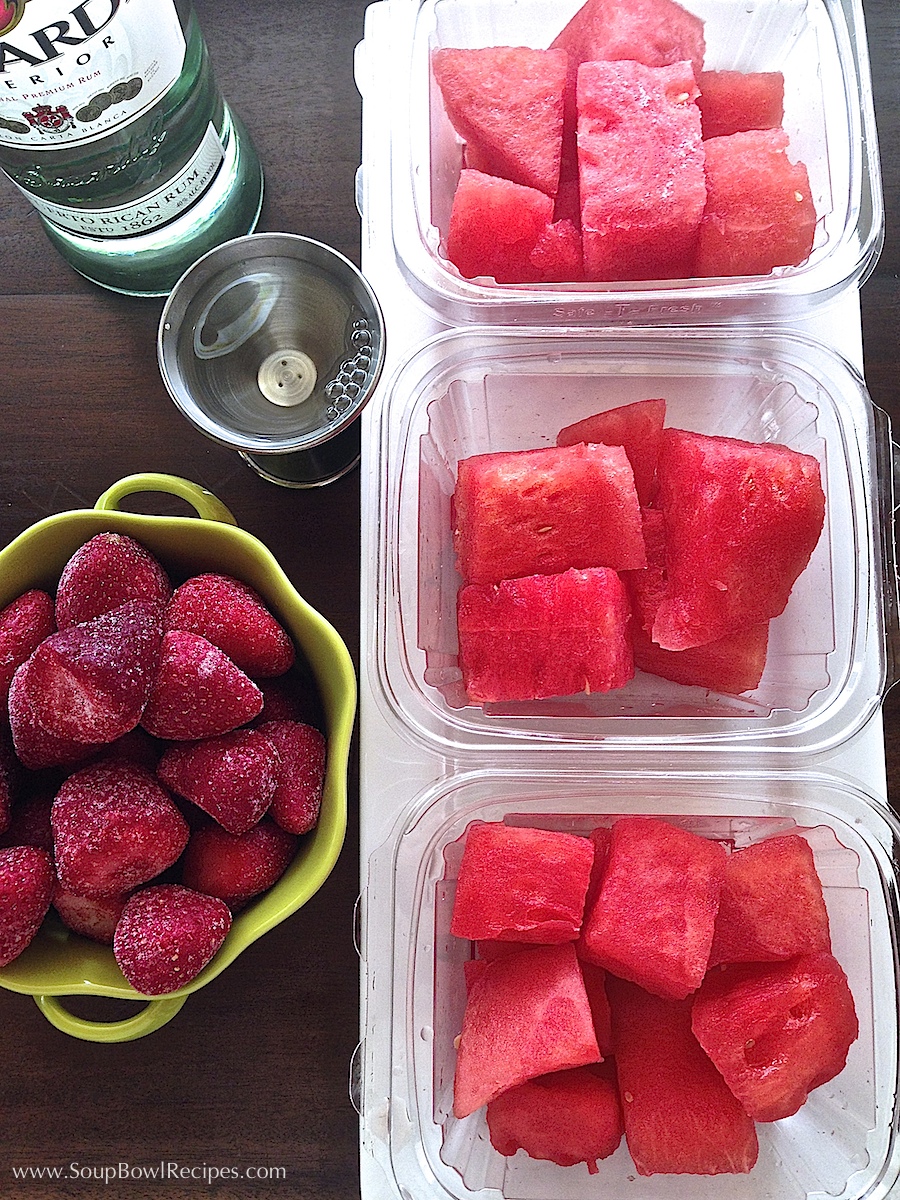
Place watermelon in a bowl and pour rum over top, then freeze for 40-60 minutes. In a blender, add watermelon and remaining ingredients and blend on high until smooth.
Pour into glasses and garnish with a wedge of watermelon.
*To make simple syrup, add 1 cup white sugar and 1 cup water in a sauce pan. Bring water to a boil and stir until sugar has dissolved. Allow to cool. Simple syrup can be stored in a covered container in the refrigerator for up to 3 months.