Soup’er Bowl Splurges

Soup’er Bowl Splurges

Julia Child once said, “Fat gives things flavor,” and I wholeheartedly agree. But, unless you’re a triathlete, you can’t eat whatever you want whenever you want. Most people, myself included, need to sustain a healthy balance between fit and fun. With that being said, I’m not going to pretend that the following recipes are in the least bit healthy. Because they aren’t. I mean, not even a little bit. But they’re good. Really good. And that’s what “splurges” are for, right? Eating good food that’s bad for you. So forget about the healthy snacks on Sunday and indulge in one of these crowd-pleasing favorites. Come Monday you can always stuff yourself with salad and spend an extra hour on the treadmill.

Baked Hawaiian Roll Ham Sandwiches

IMG_3676

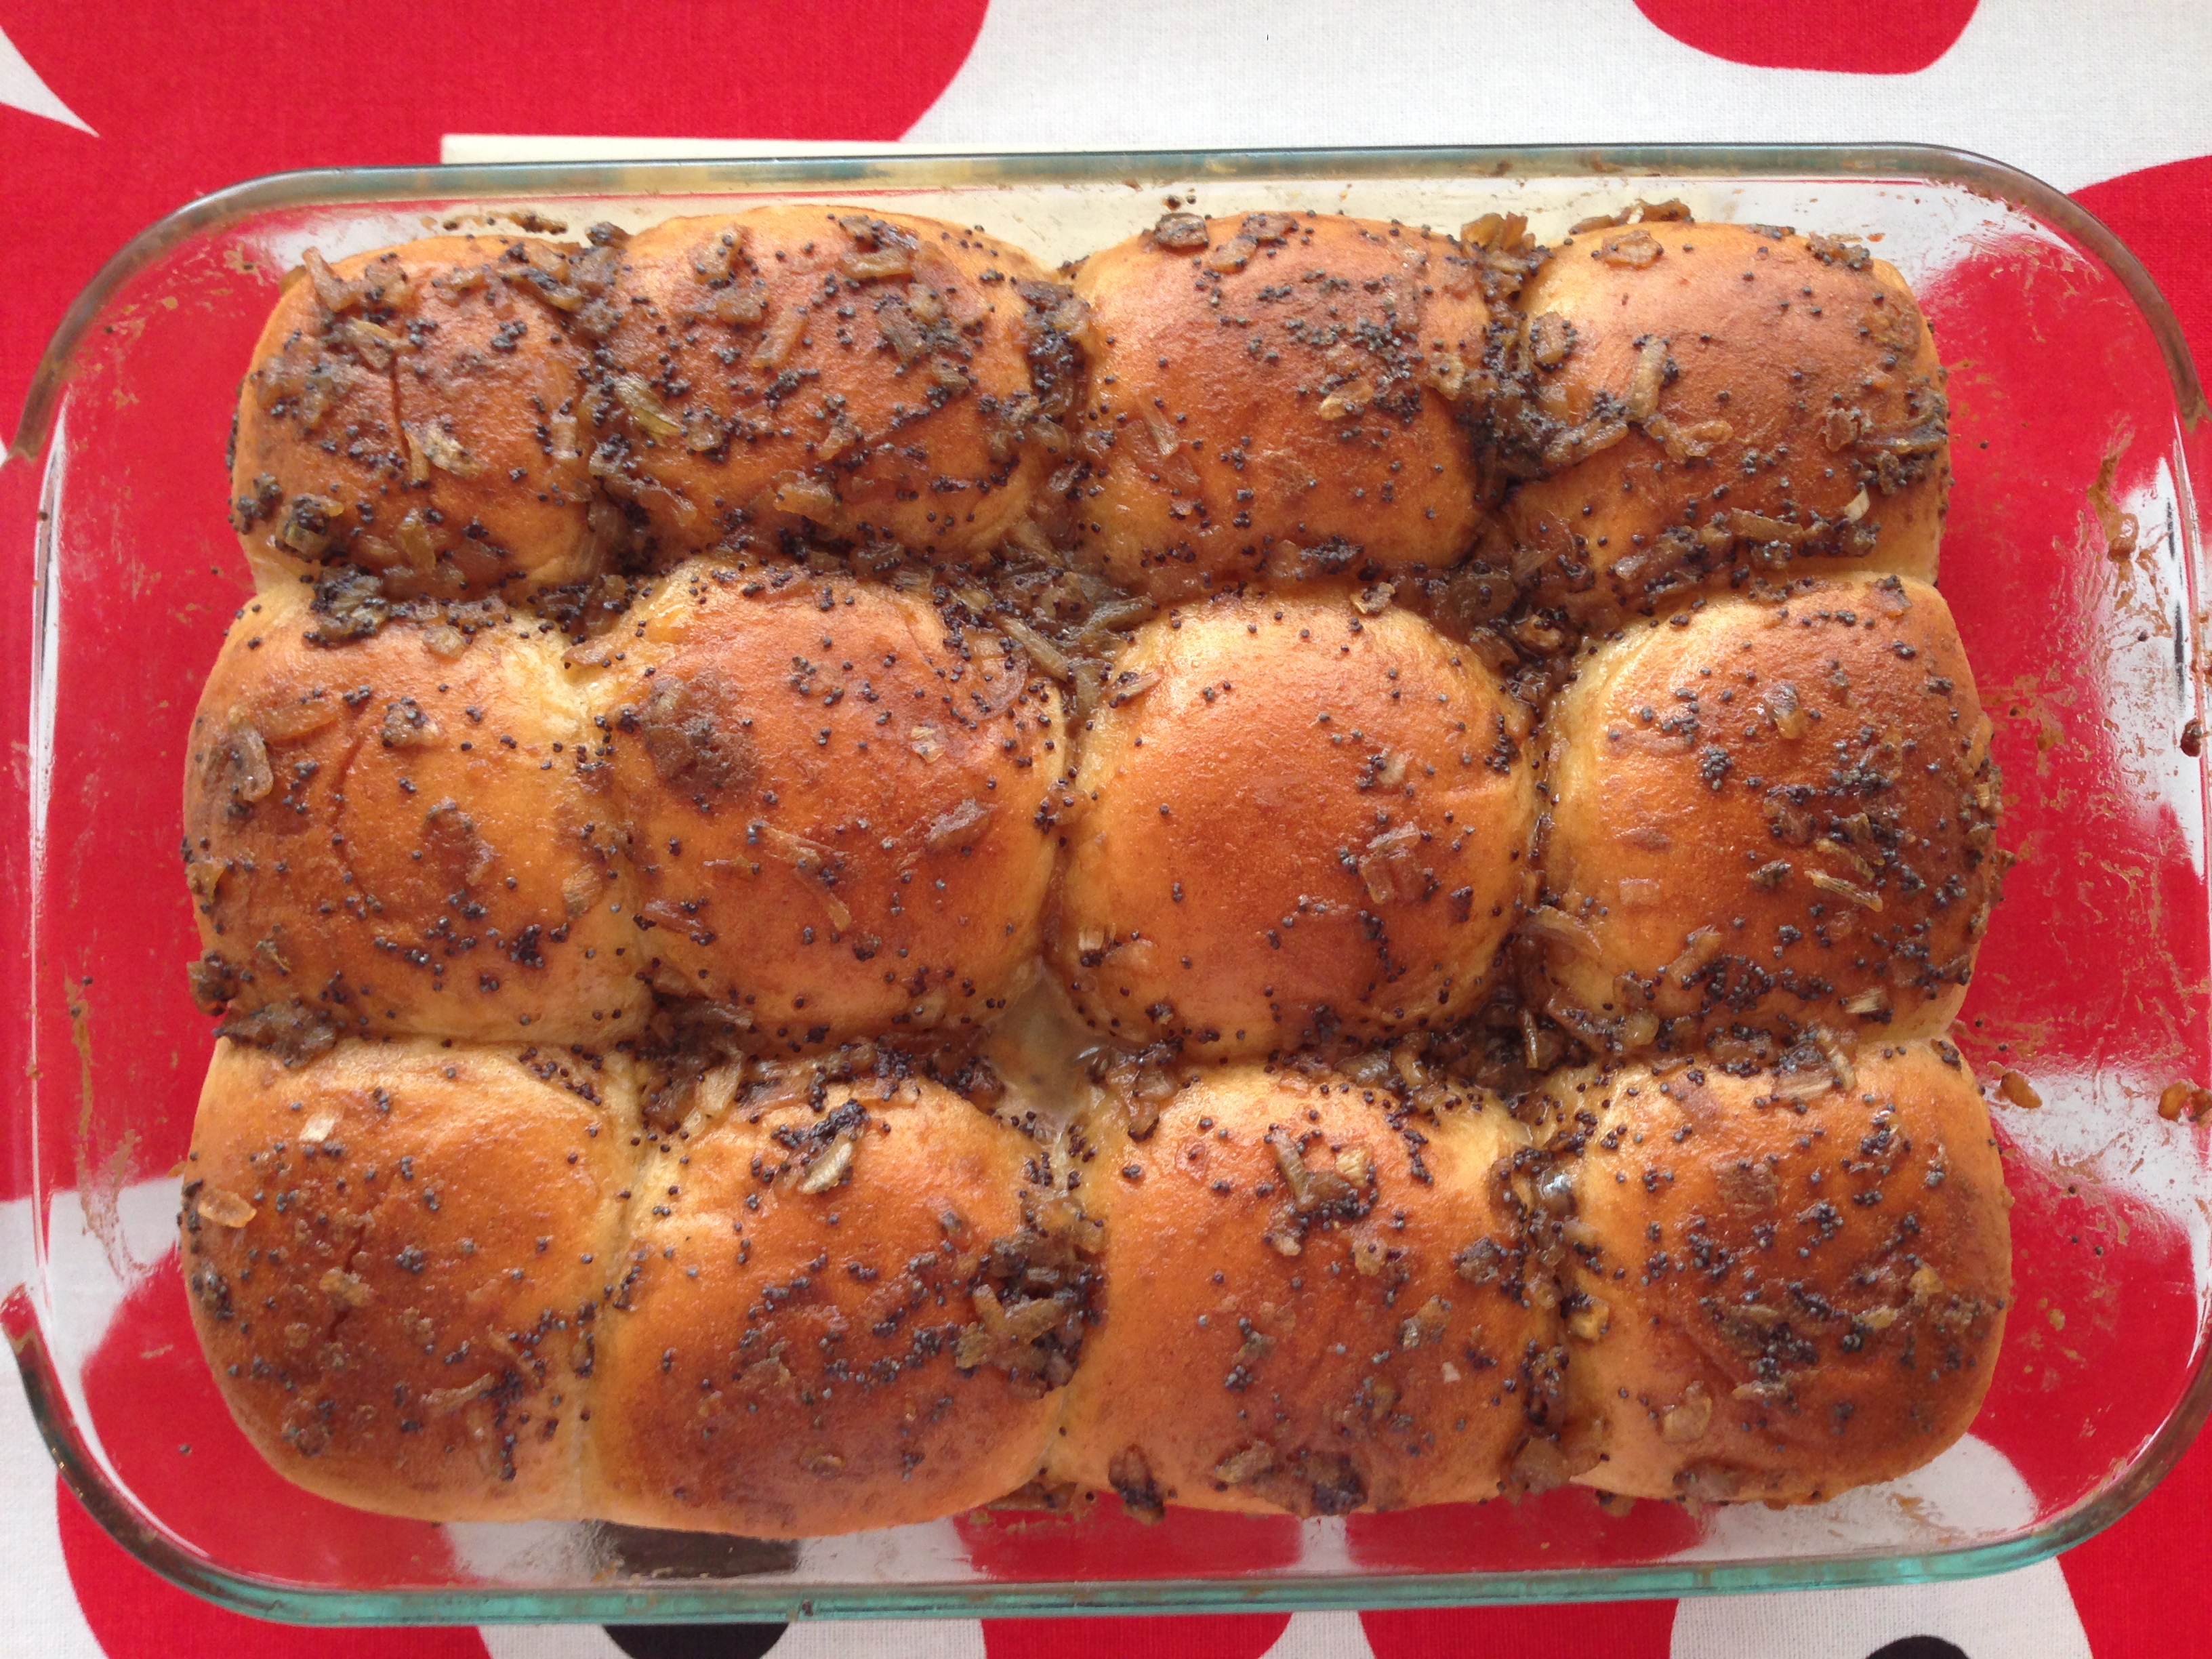
This is a great lunchtime treat that you can make a day ahead, put in the fridge, then pop into the oven right before halftime. — You can halve the recipe for a smaller group, but I guarantee you’ll want leftovers! (Recipe slightly adapted from King’s Hawaiian)

Baked Hawaiian Roll Ham Sandwich

Serves 12

2 – 12 pack King’s Hawaiian Bread Rolls
1 lb. paper thin shaved ham
8 oz. Swiss cheese slices (about 10 slices)

Glaze:
¾ cup butter, melted
2 tsp. Dijon mustard
1 ½ tsp. Worcestershire sauce
2 Tbsp. dried onions
2 tsp poppy seeds

Melt butter, then whisk together with all the other glaze ingredients, set aside.

Slice the entire pack of rolls in half, horizontally, keeping rolls in tact.

IMG_0624

Lightly mist 2 – 9×13 inch baking dishes with cooking spray. Lay bottom half of rolls in the first dish.

Evenly distribute half of ham over bread.

IMG_0621

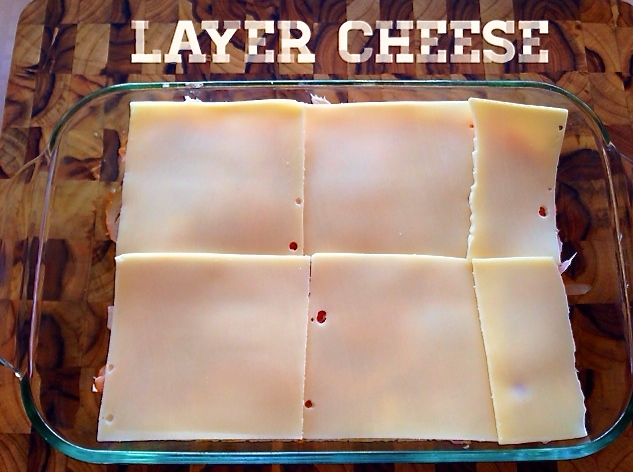
Layer cheese on top of ham.

IMG_0622

Place tops of rolls over the ham and cheese, then drizzle half of the glaze evenly over sandwiches. Using a spoon, scoop glaze from bottom of dish back over the tops of the rolls until evenly covered, lightly pressing on the tops to help them absorb the glaze. Repeat with second package of rolls and remaining ham, cheese, and glaze.

IMG_0623

Cover and refrigerate overnight. (*Note, this is an important step as it allows the glaze to fully saturate the buns).

Before baking, let the sandwiches come to room temperature for 1 hour. Cover with tin foil and bake at 350°F for 15 minutes, then remove foil and bake for another 2-3 minutes until tops begin to brown.

Cut sandwiches along the seams and dish out with a spatula.

IMG_0614

Bacon & Cheese Ranch Pull-Apart Bread

IMG_0610

This fun appetizer is always a hit when I serve it — each bite-sized cube packs a mouthful of cheesy-bacony-Ranchy goodness.

Bacon & Cheese Ranch Pull-Apart Bread

1 large, round sourdough bread loaf
1 cup shredded cheddar cheese
2-3 oz. real bacon bits
1 package Ranch dressing mix
1 cup milk (whole or 2% works best)
1 cup mayonnaise

Preheat oven to 350°F.

In a bowl, whisk the contents of 1 Ranch dressing package together with milk and mayo. Place in refrigerator for 15 minutes to thicken.

Meanwhile, with a sharp bread knife, slice sourdough loaf lengthwise into 1-inch strips, cutting down to the bottom crust, but not all the way through. Turn the loaf and cut 1-inch strips in the other direction, creating cubes.

Carefully separate the bread cubes and sprinkle half of cheese and bacon into the seams, distributing evenly. Pour Ranch dressing over the loaf and into the seams (if you don’t use all of the dressing, reserve it for dipping later). Sprinkle remaining cheese and bacon evenly over the top of loaf.

Place on a baking sheet and bake for 15-18 minutes, or until cheese is melted and starting to bubble.

Serve on a large platter with extra Ranch dressing for dipping.

And, here’s a close-up…

IMG_0613

Advertisement

Stuff My Kid Eats – Soup’er Bowl Food

Stuff My Kid Eats – Soup’er Bowl Food

IMG_0418

(Photo: My toddler at 17 months trying her first squid.)

I hail from the great Pacific Northwest and cut my teeth on a variety of seafoods, ranging from the typical salmon and shrimp to the not-so-typical geoduck and octopus. When my toddler was old enough to start on solids, it was important to me that she appreciate seafood as much as I do, so I made sure to introduce her to fish right away. One of the first things I tried was coconut shrimp. I ordered it in a restaurant and gave her one to taste. She held it upright by the tail, eating it like some do a corn dog: slowly nibbling away at the crunchy coating, then devouring the inside in a matter of seconds. She reached for another, and another, until she had stuffed herself and finished nearly half of my meal. Now, when I make this recipe at home, she’ll cozy up to the counter, wag her finger at the platter of shrimp and whisper, “I will eat you, little shrimpies!” So…if you’re a family of seafood-lovers like us, these healthy baked coconut shrimp will be a hit! And if you’re not, it’s an excellent way to warm up your tastebuds to our delicious friends under the sea.

Baked Coconut Shrimp

IMG_0563

Regardless of where you plan on watching the Big Game, at home or with friends, football fans work up an appetite, so be prepared with some easy finger-food. Impress your fellow tailgaters with a basket of coconut shrimp and a trio of dipping sauces — I promise they won’t even realize it’s healthy! (Recipe slightly adapted from Clean Eating) #GoHawks!

Serves 4-6

Olive oil cooking spray
½ cup white whole-wheat flour (regular AP white flour will work, too)
2 large eggs
6 Tbsp. panko bread crumbs
½ cup shredded unsweetened coconut
¼ tsp. sea salt
⅛ tsp. fresh ground black pepper
24 uncooked shrimp, peeled and deveined, tails on
⅓ cup unsweetened apricot jam
2 Tbsp. fresh squeezed lime juice
1½ tsp. fish sauce
½ prepared teriyaki sauce for serving
½ prepared sweet honey mustard for serving
Ground cayenne pepper to taste

Preheat oven to 375°F. Line 2 large, rimmed baking sheets with foil and mist with cooking spray. Place 3 wide, shallow bowls on a work surface. To first bowl, add flour; to second bowl, add eggs and beat lightly; to third bowl, add panko, coconut, salt and pepper and stir to combine.

Pat shrimp dry with paper towels. Holding 1 shrimp by the tail, dip in flour, shaking off excess. Quickly dip in egg, then in coconut mixture, coating thoroughly. Place on baking sheet and repeat with remaining shrimp. Bake for 12-14 minutes, rotating pans halfway through and flipping shrimp, until they are firm to the touch, lightly brown on the outside with bright pink tails.

Meanwhile, in a small saucepan on low heat, combine jam, lime juice, fish sauce, and cayenne pepper and cook, stirring constantly, until sauce is fluid and warmed through (*note: do not bring to a simmer).

Serve shrimp with apricot-lime dipping sauce, teriyaki sauce, and honey mustard.

Sidekicks:

  • Serve with a glass of buttery Chardonnay (avoid oaked), an off-dry Riesling, or a nice cold Pilsner.
  • To upgrade these shrimp from an appetizer to full-fledged meal, serve alongside jasmine rice topped with stir-fried vegetables (recipes below).

Vegetable Stir Fry

IMG_0596

This recipe can be adapted to use any vegetables of your choice; just remember to add the longer-cooking veggies to the pan first, followed by the softer, quick-cooking vegetables.

2 Tbsp. sesame oil (or other high heat oil, such as safflower or canola)
1 head of broccoli, florets and stems cut into 2-inch pieces
1 red bell pepper, thinly sliced
2 carrots, julienned
1 cup or mushrooms, thinly sliced
2 green onions, sliced in half lengthwise, then cut into 1-inch pieces
1 1-inch piece of fresh ginger, peeled and sliced paper-thin
1 garlic clove, peeled and sliced paper thin
2-3 Tbsp. low-sodium soy sauce
1-2 Tbsp. rice wine vinegar
Kosher salt and fresh ground black pepper to taste

In a wok or large skillet with tall sides, heat oil over medium-high heat until shimmering. Carefully swirl oil around in pan to coat sides. Add ginger and garlic and cook until fragrant, about 1 minute. Transfer to a plate. Add broccoli and bell peppers and sear, undisturbed, for 2 minutes, then toss and continue to cook for an additional minute.

Push the broccoli and peppers up the sides of the wok or to the outer edge of the skillet, creating a open space in the center. Add carrots and mushroom to the center of the pan, and cook, undisturbed, for 1 minute. Toss and cook for an additional minute. Add green onions, reserved ginger and garlic, 2 Tbsp. soy sauce, and 1 Tbsp. vinegar to pan. Toss all vegetables together, cooking until softened, about 1-2 minutes. Taste and add more soy sauce and/or vinegar if needed. Season with salt and pepper and serve over cooked rice.

Jasmine Rice

Using coconut water in place of tap water gives the rice a slight sweetness and provides a nice base for the savory vegetable stir-fry.

1 cup uncooked jasmine rice
1 ¾ cup coconut water
pinch of Kosher salt

In a sauce pan, bring coconut water and salt to a boil. Add rice, and stir for 1 minute. Reduce heat to a simmer, cover, and cook for 18-20 minutes or until rice is soft. Remove from heat and fluff with a fork. Serve hot.

Soup’er Bowl Food – Cincinnati Style Chili

Soup’er Bowl Foods

With Super Bowl XLVIII quickly approaching, I wanted today’s soup to be something hearty enough to sustain you while you’re cheering for your favorite team. Even if you aren’t a football fan, as I am not, you may likely find yourself either attending or hosting a party this Sunday. With that in mind, I’m dedicating this week’s recipes to dishes that can be enjoyed by Seattle and Denver fans alike. Go Hawks! (My husband made me add that last part.)

IMG_3298

Moving around the country as much as we do, I’ve been able to taste a wide variety of chilies. It seems that everyone has their own unique recipe with a “secret” ingredient they’ve vowed never to share, not even under the threat of torture. I am one of those people. When I was writing this blog, I did a lot of soul searching as to whether or not I wanted to post my chili recipe. There are very few recipes that I don’t share, and this is one. I considered including an abbreviated version, leaving out a few key ingredients, but alas, my conscience got the better of me. So here it is, folks, the full, unadulterated version of my Cincinnati Style Chili.

Cincinnati Style Chili

Serves 8

  • 1½ lbs. ground Beef (20% fat)
    1 lb. ground hot Italian sausage
    1 Tbsp. olive oil
    1 white onion, chopped
    2 green peppers, chopped
    3 celery stalks, chopped
    2 garlic cloves, peeled and minced
    1 15 oz. can diced tomatoes
    1 6 oz. can pesto/basil tomato paste
    2 bay leaves
    1 can of light beer, preferably a lager
    2 Tbsp. dark molasses
    4 cups homemade beef stock (see recipe in Homemade Stocks)
    2 cans dark red kidney beans, drained and rinsed
    1 Tbsp. flour
    3 Tbsp. water
    Chili Spice Blend (recipe below)
    Kosher salt and fresh cracked black pepper to taste

In a heavy skillet set over medium-high heat, brown the ground meats in two separate batches. Drain and set aside.

In a large stock pot, sauté onion, peppers, and celery in olive oil until tender, about 8-10 minutes. Add diced tomatoes (breaking apart with hands) and juice, tomato paste, minced garlic, bay leaves, and molasses. Add ¼ cup Chili Spice Blend. Stir and cook until the juices from the tomatoes thicken and become bubbly, about 5-8 minutes.

Add beer and cook until liquid reduces by half, about 3-5 minutes. Stir in beef stock and reserved meat and bring to a boil, then immediately reduce to a simmer. In a separate bowl or shaker cup, mix flour and water to create a “slurry” — you’ll want to whisk or shake the mixture until flour has dissolved and the slurry is smooth with no clumps remaining. Add to chili. Taste and season with salt & pepper and more Chili Spice Blend as needed.

STOVETOP INSTRUCTIONS:
Partially cover and simmer for 6-8 hours, stirring occasionally. 15 minutes before removing from heat, add drained beans and continue to cook.

CROCKPOT INSTRUCTIONS:
Pour chili into crockpot and stir in dried kidney beans, cover, and set on LOW heat for 8 hours.

*This chili is best when made a day ahead, as time in the refrigerator allows the flavors to marry and the chili to thicken.* Pour chili into a storage container and chill, uncovered, until cool. Cover and continue to chill overnight.

Reheat slowly over medium heat, stirring often so that chili doesn’t burn to the bottom of pot. Remove bay leaves. Taste and season with salt & pepper and more Chili Spice Blend if needed.

Chili Spice Blend

IMG_0504

This recipe makes about ¾ cup of seasoning. I use the entire ¾ cup in my chili, but start by adding ¼ cup at a time, then add more as you see fit. 

In a bowl or small jar, mix the following ingredients:

2 Tbsp. each of:
brown sugar
cinnamon
coco powder
cumin

1 Tbsp. each of:
chili powder
dried oregano

1tsp. each of:
allspice
cayenne pepper
coriander
garlic powder

½ tsp. each of:
cardamom
ginger
nutmeg
red-pepper flakes

Sidekicks:

  • You’re gonna want a beer with this chili! Not only is it a Super Bowl tradition, but beer will cut the heat you’re likely feeling after a few bites. Try a German hefeweizen, who’s banana notes pair well with the sweeter spices, or another light beer, such as a lager or pilsner. If you’re not a beer drinker, uncork a bottle of zinfandel instead.
  • Also, cornbread. But not the overly sweet stuff you get from a box-mix. The recipe below is quick and easy, and can hold up against the weight of this chili.

Savory Skillet Cornbread

IMG_0490

The addition of red bell peppers, leeks, and savory spices makes a nice accompaniment to this hearty chili. If you don’t have a cast-iron skillet, use a 9-inch square baking pan. (This recipe has been adapted from Everyday Food)

4 Tbsp. butter
2 cups stone-ground yellow cornmeal
3 Tbsp. brown sugar
1 tsp. baking soda
1 ½ tsp. salt
1 tsp. herbs d’provence (dried rosemary or thyme can be substituted)
2 large eggs
2 cups low-fat buttermilk
½ red bell pepper, diced
½ leek, white and light green parts only, diced
fresh cracked black pepper

Preheat oven to 425°. Put butter, peppers, and leeks in a 9-inch cast-iron skillet; place in oven until butter is melted and peppers and leeks are soft, about 5-8 minutes.

IMG_3304

Meanwhile, in a medium bowl, whisk cornmeal, sugar, baking soda, herbs d’provence, black pepper, and salt. In a large bowl, whisk together eggs and buttermilk.

Carefully remove hot skillet from oven; immediately pour butter, red peppers, and leeks into the buttermilk mixture, and whisk to combine. Using a pastry brush, coat bottom and sides with remaining butter.

Stir cornmeal mixture into buttermilk mixture until just moistened. Scrape batter into hot skillet; bake until golden, about 25 minutes. Let cool at least 10 minutes before slicing and serving.

Stuff My Kid Eats – Chicken Paillards with Squash and Spinach and Red Quinoa

Stuff My Kid Eats

IMG_3288

Food is huge part of daily life in our household. We eat it. We discuss it. We take pictures of it. We blog about it. So, it’s no surprise that as soon as my toddler wakes up in the morning, she wants to know what’s for breakfast. And not 20 minutes after breakfast, she wants to know what’s for lunch. Breakfast and lunch are her favorite meals — she usually gets to choose her main course (within reason), then is subjected to my side-dish-of-discrestion (vegetables). Now, here’s where our day falls apart: dinner. Inevitably, somewhere between lunch and our afternoon activities, she will ask, “What’s for dinner, Mommy?” Ugh! I dread this questions. I have nightmares about this question. I usually sugarcoat the answer to avoid a meltdown, and I always lead with the starch: “Rice with super yummy sausage and beans!” or “Risotto with pretty pink shrimp!” This works about 50% of the time. But, for whatever reason, if my answer contains the word chicken, she falls to the floor in tears, wailing, “Nooo, not chicken!” I don’t understand this. She loves chicken. She can eat her weight in chicken. It’s the single most popular food item that she will clear off her plate every time I serve it. EVERY. TIME.

Below is a dish, that when spoken aloud, sends my child into another universe with despair, but always inducts her into the “clean plate” club. It’s simple. It’s delicious. But it could probably use a better name; maybe “Sweet Squash with Spinach Pinwheels and (spoken softly)…chicken.” Again, good luck! I know you’ll enjoy it, hopefully your kids will, too.

Chicken Paillards with Squash and Spinach

Chicken Paillards with Squash & Spinach

This recipe comes to you by way of my former employer, Martha Stewart, and is an easy way to prepare deliciously tender chicken breasts. You can put your own personal touch on this versatile recipe by experimenting with other toppings such as oven-dried tomatoes, chopped Kalamata olives, and feta cheese; or fresh diced tomatoes & avocados with cilantro leaves and a squeeze of lime. (Recipe from Martha Stewart Living)

Serves 4

½ small kabocha squash, unpeeled, seeded and cut lengthwise into ¾-inch slices (see Tips*)
1 small red onion, cut into wedges, root end attached
2 Tbsp. extra-virgin olive oil
2 skinless, boneless chicken-breasts, halved (see How To*)
Kosher salt
Red-pepper flakes to taste
1 Tbsp. unsalted butter
6 fresh sage leaves (from about 4 sprigs)
1 cup baby spinach leaves

You will also need:
Plastic wrap
Meat mallet

Preheat oven to 425°. Distribute squash and onion evenly on 2 rimmed baking sheets. Drizzle with 1 Tbsp. oil, season with salt, and toss to coat. Spread in a single layer and roast until squash is tender, about 15-20 minutes.

Meanwhile, pound chicken to a ⅛-to-¼-inch thickness. Season on both sides with salt and red-pepper flakes (see Tips*). Heat a large skillet to medium-high heat. Swirl in remaining Tbsp. oil, then butter. Fry sage until just crisp, about 30 seconds to 1 minute; let drain on a paper towel.

Working in 2 batches, add chicken to pan and cook until golden and cooked through, about 2 minutes per each side. Divide chicken among 4 plates and top with spinach, squash, onion, and sage.

*Tips:

  • Cooking red-pepper flakes mellows their heat, but if you prefer, replace with fresh cracked black pepper instead. (I use red-pepper flakes, then before I cut and serve my toddler’s chicken, I scrape off the larger pieces so that she still gets the flavor without the fire.)
  • If kabocha squash (pictured below) is unavailable in your supermarket, substitute acorn squash — both can be eaten with the rind, just remember to remove the stem and end piece.

Kabocha Squash

*How To Halve a Chicken Breast:

To halve a chicken breast, lay the breast flat on a cutting board with the smooth side down. Using a sharp knife, cut away the small piece of meat that’s attached to the larger breast, called the “tender.” Set tender aside and freeze for another use (hint, hint…I’ll be posting a recipe for chicken tenders soon).

Butterflying a chicken 1

Turn breast over. With your knife, begin slicing the breast in half horizontally, all the way through. Repeat with second breast.

Butterflying a chicken 2

Butterflying a chicken 3

Lay 4 breast halves on a piece of plastic wrap and top with a second piece of plastic wrap. Using a meat mallet, pound chicken all over until you’ve reached an even thickness of about ⅛-inch.

Butterflying a chicken 4

Sidekicks:

  • This dish pairs well with a Dry Riesling, which counters the slight heat from the red-pepper flakes.
  • Serve chicken with red quinoa (pictured): Cook 1 cup dry red quinoa per package instructions, but replace water with chicken stock. Once cooked, mix in ¼ cup slivered almonds.

Red Quinoa with Slivered Almonds

Taking Stock: A Review of Store-Bought Stocks

Taking Stock: A Review of Store-Bought Stocks

Store-bought stocks

Nothing makes me feel like more of a cook and health-conscious mom than standing over a steaming pot of homemade stock, stirring the meat and vegetables that I cut that morning. BUT, and this is a big but, there are many days when I just don’t have the time or the desire to commit four hours to the task. To make my life easier, I always ensure that I have a few cans of stock stored away in my cupboards for just those moments. So, when a recipe calls for homemade stock and you just don’t have the time, store-bought stock is a quick and easy alternative.

When shopping for stocks, I usually pick what’s on sale, but that’s not always the healthiest or tastiest option — and the restults have been hit or miss. So, over the course of a weekend, I forced my husband to put down his Playstation controller and taste-test over a dozen different meats and vegetable broths, and two seafood stocks (thanks, Honey, I owe you for this one!). We rated each stock based on taste, aroma, and appearance, and also took into account nutritional value and price point. Here’s what we found…

CHICKEN STOCK

Store-bought stocks

Chicken stock is arguably the most commonly used stock for cooking, which is why grocers tend to carry a greater variety of it. In my search of four local markets, I was able to find about 8-10 brands, and reviewed six of the most commonly reoccurring ones. As you can see from the photo above, the colors were surprisingly diverse, spanning the “chicken spectrum” from a poached to deep fried. Even more surprising was the difference in taste and smell. Among the six stocks, there was a definite top three and bottom three, with a clear winner that pulled above the rest. (Note: every stock we rated contained zero fat and less than 20 calories per serving, therefore, I only noted the sodium content for each brand.)

Butterball (pictured top left): With no surprise, Butterball, a name synonymous with poultry, had the best overall taste, smell, and appearance. It was sufficiently chicken-y, without being either overly salty or overly bland. The price was appealing, too, at $0.49 for a 14.5 oz. can. Of course, good flavor comes at a cost, and with Butterball, it’s the cost of high blood pressure; 820g of sodium per serving.

Swanson (bottom left): Swanson brand was by far the easiest to find, as it appeared in the soup isle of every grocery store I visited. It was our second pick for flavor and price at $1.50 for a 32 oz. carton. The aroma and color were a bit off-putting, but if added to a dish with other aromatics, could easily be countered. Slightly better for the heart, Swanson contains 510g of sodium per serving.

College Inn (top middle): Fairly easy to find, comparable in price to the other two, and even less sodium per serving (450g), College Inn was the final in our top three picks. An excellent aroma of roast chicken, with a subtle (if not slightly bland) chicken flavor.

Here’s a brief rundown of the bottom three picks in the order we rated them:

Kitchen Basics (bottom right): This brand was easier to find than College Inn, but much more expensive than the rest with a price of $2.69/32 oz. carton. It had the second lowest sodium count at 210g per serving, and although it had a nice smell of grilled chicken, there was too strong of a vegetable flavor — which would be excellent for vegetable broth, but not for chicken stock.

Emeril’s (top right) and Rachael Ray (bottom middle): We found that neither of these stocks were worth the price ($2.62 and $1.98 respectively for a 32 oz. carton). Emeril’s was very salty and left an oily finish on the tongue, with a high sodium count of 590g per serving. Rachael Ray’s Low Sodium Stock-in-a-Box obviously had the least amount of sodium per serving (135g), but also had the least amount of flavor.

When buying pre-made stock, I want to spend my money on something that tastes good, but is also healthy. Although Butterball had the best overall flavor, I plan on using College Inn for my “chicken stock emergencies.” The smell was fantastic, the lower sodium count was appealing, and the somewhat thin flavor can easily be punched up with the addition of other vegetables and spices. Next week…beef stock!

Zesty Tomato Soup with Balsamic Reduction, Fried Sage; Open-Face Tuna Melt

Zesty Tomato Soup with Balsamic Reduction and Fried Sage Leaf
Served with Tuna Melt Toast and Arugula Salad

Zesty Tomato Soup with Balsamic Reduction and Fried Sage

This is one of my all-time favorite soup recipes. My mom used to serve a version of this every Christmas, and after a while, the family started referring to it as, “Christmas Soup.” The recipe has evolved over the years with the addition of orange zest and balsamic vinegar, and is now no longer relegated to being served exclusively on December 25th. (Note: the recipe can easily be adapted to suit a vegetarian by substituting vegetable broth for the chicken stock.)

Serves 6

1 Tbsp. olive oil
2 Tbsp. butter, cut into cubes
1 white onion, coarsely chopped
2 celery stalks, coarsely chopped
2 carrots, peeled and coarsely chopped
4 cloves garlic, peeled and slightly crushed
3 fresh sage leaves finely chopped
28 oz. can peeled whole tomatoes, drained, liquid reserved
1 ½ tsp. freshly grated orange zest (about 1 large orange)
2 bay leaves
4 cups chicken or vegetable stock (see recipe in Homemade Stocks)
6 oz. can tomato paste
8 whole cloves
2 Tbsp. brown sugar
1 Tbsp. balsamic vinegar
1 ¼ cup whole milk
2 tsp. Kosher salt, plus more to taste
Fresh ground black pepper to taste

Preheat oven to 325°. In a large glass baking dish, combine onion, celery, carrots, garlic, orange zest, chopped sage leaves, bay leaves, drained tomatoes, and olive oil. Season with 1 tsp. salt and dot the top with butter cubes (Figure 1). Bake for 75 minutes, stirring half way through.

Figure 1 – Slow roasting tomatoes and vegetables

Slow roasted tomatoes

Remove baking dish from oven and let cool slightly. Find bay leaves and set aside. Pour tomato/vegetable mixture into a soup pot with ¼ cup reserved tomato juice, and using a hand blender, purée until smooth (or working in two batches, purée tomato/vegetable mixture and ¼ cup reserved tomato juice in a blender or food processor until smooth, then pour into soup pot). Use more tomato juice to thin if necessary.

Add tomato paste, chicken stock, balsamic vinegar, brown sugar, 1 tsp. salt, fresh cracked pepper, whole cloves, and reserved bay leaves to tomato/vegetable purée. Simmer for 1 hour partially covered, stirring occasionally, until soup thickens. Add milk and simmer for an additional 15 minutes. With a slotted spoon, remove bay leaves and whole cloves, discard. Season with more salt and pepper if desired.

When ready to serve, ladle soup into pre-warmed bowls, drizzle with balsamic reduction and top with a fried sage leaf.

Balsamic Reduction:

1 cup balsamic vinegar
1 tsp. honey
1 garlic clove, peeled
1 sage leaf
2 whole cloves

In a heavy sauce pan, bring all ingredients to a boil, then immediately reduce to a simmer. Continue to simmer, watching closely, until liquid is reduced to ¼ cup, about 30-40 minutes. Pour reduction through a fine-mesh sieve and allow to cool before using.

Fried Sage Leaves:

Fried Sage Leaves

6-8 fresh sage leaves
¼ cup olive oil
Flaky sea salt, such as Maldon

In a heavy skillet over medium-high heat, heat oil until shimmering. Gently place sage leaves in oil and fry until leaves stop bubbling and are crispy but not burned, about 8-10 seconds. Transfer leaves to a paper towel. Sprinkle with salt.

Sidekicks: 

  • Consider serving a cup of Zesty Tomato Soup with an Open-Face Tuna Melt: Slice French bread on the diagonal. Drain a 12 oz. can of tunafish and combine in a bowl with ¼ cup mayonnaise, 2 Tbsp. dijon mustard, 1 tsp. soy sauce, 1 tsp. worcestershire sauce, and 1 finely chopped shallot. Season with salt and pepper. Spread a heaping spoonful of tuna mixture on the bread, and cover with a slice of sharp cheddar cheese. Place slices on a cookie sheet and broil until cheese has melted and is bubbly at the edges. Top with a handful of arugula dressed with equal parts olive oil and white wine vinegar, season with salt and pepper and enjoy!
  • This soup pairs well with a chilled glass of Sauvignon Blanc or Chardonnay.

Shortcuts:

  • Substitute store-bought stock for homemade stock.
  • Instead of roasting tomatoes and vegetables in the oven, replace 28 oz. can of whole peeled tomatoes with a 28 oz. can of fire roasted whole peeled tomatoes. Start by sautéing the onion, carrots, celery, and garlic in butter and oil directly in your soup pot. Once vegetables are soft and starting to brown, about 10-15 minutes, add the drained tomatoes, orange zest, and herbs. Cook for 15 minutes, then allow to cool slightly before following the instructions on puréeing.

Soup’er Finds

Soup’er Finds

Kitchen gadgets

There’s not a day that goes by that I don’t stand in my kitchen and say, “What would I do without this (fill in the blank)?!” Over the years I’ve accumulated a variety of culinary tools designed to make cooking easier; some have been useful, while others have been embarrassingly silly (the banana slicer, anyone?). But the ones that have withstood the test of time, that have earned a place of honor in my kitchen, and have truly made my life simpler, these are the treasures that I plan on sharing with you in Soup’er Finds.

January 2014

Cuisinart 2-Speed Smart Stick Hand Blender

Cuisinart Hand Blender

One item that I’ve found particularly helpful (and versatile) in my kitchen is the Cuisinart 2-Speed Smart Stick Hand Blender. With a 200-watt motor, it easily purées all my soups directly in the pot, saving me the hassle of processing hot liquid in my blender. The Smart Stick comes with a whisk attachment and 16 oz. plastic measuring beaker, which is excellent for whipping up homemade vinaigrettes. But, it’s the mini-chopper attachment that makes this product stand out from other hand blenders. I’ve found it so much more convenient to chop up small batches of food than if I were to pull out my heavy duty food processor. Whether I’m making a quick pico de gallo for fresh guacamole, chopping nuts to add to cookie batter, or blending seasonal fruit to top my toddler’s morning waffles — I find myself using it a few times a week! If your local kitchen store doesn’t carry it, there’s a great deal online at Kitchen and Company for $59.99 +free shipping.

Stuff My Kid Eats – Lemony Pasta with Tuna Sauce

Stuff My Kid Eats

Stuff My Kid Eats

(Photo credit: Audrey Kranz)

I have been fortunate enough to have a toddler who is relatively adventurous in the foods she will try — and often even like. This is not to say that we don’t have our moments of refusing to eat, declaring something “yucky” simply because it’s brown, or ending a meal in tears; she is 2 years old, after all! But almost without fail, I can count on her to at least taste everything I put in front of her, even if she won’t finish it. When I do find a dish that is particularly popular with her, I feel like SuperMom and do a private little victory dance in my chair across the table from her.

In this weekly segment, I’ll be sharing quick, easy, healthy recipes that break away from the mac-‘n-cheese/quesadilla/chicken nugget rut that’s so easy to get stuck in. All of the meals I post here are great for kids, and delicious for adults as well. Good luck and enjoy!

Lemony Pasta with Tuna Sauce and Arugula

Lemony Pasta with Tuna Sauce

I found this recipe in one of my husband’s Men’s Health magazines over the summer (I’ll let you draw your own conclusions on the similarity of a grown man’s pallet to that of a toddler’s.) I was able to throw this meal together in 15 minutes, then crossed my fingers that it was something my daughter would eat — she did, and now it’s one of her favorites. Hallelujuah!

Serves 4

1 lemon
8 ounces radiatore pasta
2 – 5 oz. cans of tuna in olive oil (see Tips*)
2 canned anchovies (even if you don’t like anchovies, don’t omit them! They really enhance the flavor.)
¼ tsp. red-pepper flakes, divided (see Tips*)
5 cups baby arugula
¼ cup fresh grated parmesan cheese
Kosher salt and fresh cracked black pepper to taste

Juice and zest lemon. Cook pasta per package instructions; drain, saving ½ cup of cooking water.

While the pasta cooks, drain tuna, saving 3 Tbsp. of the oil. In a blender or food processor, combine tuna, reserved oil, lemon juice, anchovies, and ⅛ tsp. red-pepper flakes; process until smooth.

In a large bowl, toss the hot drained pasta with tuna sauce (thin with pasta water if necessary). Add arugula, lemon zest, salt & pepper, and remaining red-pepper flakes (see Tips*). Serve topped with fresh grated parmesan cheese and cracked pepper.

*Tips:

  • I waited to add the final ⅛ tsp. red-pepper flakes until after I dished my toddler’s serving to save her delicate tastebuds from too much heat (if there is such a thing).
  • To make this a heartier meal, buy an additional can of tuna, drain, then add chunked tuna to the finished pasta.
  • Look for Genova brand tuna, if available (pictured below).

Genova Tuna

Book Club: January 2014

Book Club

Book Club
One of my many passions in life, aside from cooking, is reading. Novels, magazines, cereal boxes, it doesn’t matter — if it has text, I’ll read it! Over the years, I’ve acquired a large collection of well-loved and often-turned-to cookbooks, that without, would leave me feeling lost in the kitchen. I always have my eye out for new ones, and when I find a real gem, you better believe I’ll be curled up on the couch reading it from cover-to-cover as one would a novel. In this monthly segment, I outline a few of my most recent favorites, along with some other fun reads to keep you entertained while you’re not slaving away in the kitchen. Don’t forget to check back next month for my newest Book Club picks!

January 2014

COOKBOOK:

Pure Flavor by Kurt Beecher Dammeier

Pure Flavor

You don’t have to be a Seattleite to enjoy this Northwest-based cookbook. The author, and creator of Beecher’s Handmade Cheese located in Pike Place Market, gives the reader 125 recipes for every type of home cook, plus tips on buying and preparing select ingredients. Bonus: if you are a Washingtonian or are planning a trip to the area, be sure to read the Northwest Food Icon sections (intermittently dispersed throughout the book) for suggestions on outstanding local food purveyors. Check out Pure Flavor on Amazon or visit Beecher’s Handmade Cheese website for info on his other products.

Recipes to try:
Butter-Rubbed Salmon with Blueberry Sauce
Apricot-Dijon-Glazed Pork Tenderloin
Roasted Parsnip Puree
Fruit Salad with Vanilla Syrup
Deep-Dish Cinnamon Buns

FOODIE BOOKS:
Not cookbooks, per say, but other books (memoirs, novels, short essays) centered around the joys of cooking and eating.

My Life in Paris by Julia Child with Alex Prud’homme

My Life in France

This humorous, and sometimes touching, memoir by Julia Child gives you an inside look into Child’s transformation from housewife, to cooking goddess, all the while touring you through Europe and beyond. Read a full synopsis on Alex Prud’homme‘s website — he’s not only the co-author, he’s Julia Child’s nephew as well!

Food for the New Year: Healthy Snacks

Food for the New Year: Healthy Snacks

Healthy Snacks


I’m not a huge fan of New Year’s resolutions, but every January I find myself saying, “I’m going to live healthier this year.” Although we already eat well balanced meals in our home, and I workout (occasionally), I struggle with the mid-day snacking and saying no to the bowl of microwave popcorn my husband likes to make after dinner. With that in mind, I’ve decided to stock our pantry with smart alternatives to the cheddar cheese crackers that somehow find their way onto my shelves every week. Now, instead of reaching for a bag of fat-laden snack food, I’ll be baking up a crispy batch of kale chips instead!

Below are some suggestions for low-calorie, high flavor tidbits to help you curb your appetite between meals, refuel after a workout, or beat the midnight munchies.

Note: With the exception of the Low-Fat Deviled Eggs (which she said made her tongue “ouchy”), all of these snacks have been taste-tested and toddler approved.

Low-Fat Deviled Eggs with a Kick!

Low-Fat Deviled Eggs

Normally considered a picnic splurge, this low-fat version of the classic deviled egg can be enjoyed all year long without the guilt — or the ants! The addition of horseradish kicks up the flavor to help curb your appetite.

Serves 6 (serving size: 2 halves)

6 eggs
¼ cup low fat cottage cheese
2 Tbsp. low fat mayonnaise
1 Tbsp. prepared horseradish
1 tsp. dijon mustard
1 tsp. white wine vinegar
6 small celery leaves for serving (optional)
Kosher salt

Place eggs in a single layer in a saucepan; cover with water. Bring to a boil over medium-high and cook for 12 minutes. Remove eggs from heat, and place in a bowl of ice-cold water. Let stand until cool enough to handle before peeling.

While eggs are cooling, mix cottage cheese and next 4 ingredients in a bowl with an hand blender, or in a small food processor until smooth.

Peel eggs and discard shells. With a wet knife, cut eggs lengthwise and scoop out yolk. Add egg yolks to cottage cheese mixture and stir until combined. Season with salt.

Fill eggs with yolk mixture and top with a celery leaf.

Deviled eggs can be covered and stored in the refrigerator for 1 day.

Kale Chips

Kale Chips

Kale is a wonderful source of calcium; potassium; vitamins A, C, and K; and provides anti-inflammatory benefits for the body — so it’s a great snack to counter some of those aches and pains you’ll likely experience from your new workout routine.

Serving size: It’s kale — eat as much as you want!

2 bunches of curly leaf kale (green or red, or a colorful mix of the two)
4 Tbsp. olive oil
½ tsp. Kosher salt
¼ tsp. fresh cracked pepper
½ tsp. of flaky sea salt, such as Maldon, or another of your favorite savory seasonings (eg. smoked paprika, chili powder, garlic powder, or Johnny’s Seasoning Salt)

Preheat oven to 350° and lightly spray three rimmed baking sheets with non-stick cooking spray. Fold the kale in half lengthwise, then with a sharp knife, cut the stem away from the leaves. Tear kale into 2″x2″ pieces, wash with cold water, lay flat on a clean kitchen towel and thoroughly pat dry. In a bowl, toss kale with olive oil and salt, then spread in a single layer onto baking sheets. Make sure the kale pieces are not too crowded, otherwise they will steam rather than dry out, so use a fourth sheet if necessary.

Sprinkle pepper evenly over kale, then bake for 15 minutes, or until crispy but not burned. Remove from oven and sprinkle with flaky sea salt or other desired seasoning. If there are any soft pieces of kale remaining, return to the oven and bake for an additional 2-4 minutes.

Let cool before eating. Kale can be stored in an airtight container for up to 4 days. Do not refrigerate.

Edamame

Edamame

These tasty little soy beans are packed full of protein, fiber, calcium, iron, and many of your essential daily vitamins and minerals, which just goes to show that good things really do come in small packages! (Edamame can be found in the freezer section of your grocery store, usually with the frozen vegetables. Look for edamame in their pods.)

Serves 2 (serving size: 1 ⅛ cup edamame)

2 ¼ cup edamame in their pods, cooked per package instructions
1 tsp. flaky sea salt (such as Maldon)

Place cooked edamame in a bowl and sprinkle with sea salt. With your teeth, squeeze soy beans from pods directly into mouth, discard pods. Smile. Repeat.

Quick Pickled Veggies

Quick Pickled Veggies

Nothing satisfies my munchies more than this crisp, tart salad. Try it by itself or as a lunchtime accompaniment to a healthy, low-fat tuna sandwich.

Serves 2 (serving size: 1 ½ cup salad)

3 cups mixed vegetables, julienned (carrots, celery, bell peppers, broccoli stems, cabbage, or whatever else you like)
1 Tbsp. olive oil
2 Tbsp. rice wine vinegar
⅛ tsp. ground coriander (optional)
½ tsp. Kosher salt
Fresh cracked black pepper to taste

Place veggies in a serving bowl. In a measuring cup, whisk together remaining ingredients until thoroughly combined. Pour vinaigrette over veggies, toss and let stand for 10 minutes. Toss again, then serve.

Shortcut: Bags of precut matchstick vegetables are available in the produce section of most grocery stores.

Blue Cheese and Almond Dates

Blue Cheese Almond Dates

Dates and blue cheese have been found to benefit the intestinal tract, so swap out your evening dessert for these tasty little treats and you’ll not only beat your sweet tooth, you’ll go to bed with a happy stomach as well.

Serves 4 (serving size: 3 dates)

12 large pitted dates
4 Tbsp. blue cheese
2 Tbsp. slivered almonds, coarsely chopped

Slice dates open with a sharp knife. Fill each date with 1 tsp. of blue cheese, then lightly squeeze date closed. Roll open side of date in diced almonds so that they cover the blue cheese. Enjoy after dinner with an ounce of your favorite digestif, such as brandy, grappa, ouzo, or dry sherry.